• Contour sawing Pope Leo the Great

    Another saint's statue

    Pope Leo the Great upper body

    As you might remember I copied the statue of Thomas Aquinas for St. John's Cathedral again. That statue has now been installed and I could move right on to the next one: Pope Leo the Great. It's a one hundred year old statue of a bearded man with a tiara, a book and a Byzantine cross.

    At first I thought it represented Pope Gregory the Great in stone, because the stained glass window behind the statue shows a similar Pope: also with a book and a Byzantine cross and tiara, but without a beard and with a dove.

    stained glass window of Pope Gregory
    Pope Gregory looked suspiciously like Pope Leo
    stained glass window with inscription Gregor . Magn.
    But the name of this pope is at the bottom of the window: Gregorius Magnificus

    Attila the Hun

    Cracks in the face of the statue of Pope Leo
    weathering traces in the face

    But it turned out that I was mistaken after all, partly because the console of this statue shows Attila the Hun crouching. In the year 452 the Hun Army was camped near Lake Garda, with plans to attack Rome, but Pope Leo visited him and talked it out of his head. Talk about power of persuasion. Pope Gregory only came a hundred years later.

    Weathering process

    robe of the statue of Pope Leo has weathered
    disappeared folds in the garment

    The two statues of Thomas Aquinas left in a crate headed for Den Bosch, where the new statue was placed on the church and the old statue was put in the museum. By return mail I received the old statue of Pope Leo back. On my scaffolding visit I noticed that the statue still had almost all its details, but the stone wasn't in a very good condition.

    Just like Thomas, the statue was made of Udelfanger sandstone. The material has been applied vertically at the time, and that has had an impact on the weathering: vertical traces of watering and the disapperance of a number of folds of his garment. The statue also shows serious exfoliation on the back and if nothing happened now you'd have a chance that in a decade many details will be much stronger affected, which would make it very difficult to make a proper reconstruction of it.

    Vertical layering

    foot of the statue of Pope Leo the Great
    crumbled pleats

    As I explained in the first article about the statue of Thomas Aquinas it's not desirable to have the stone's layers run vertically through the statue. But it is not always possible to avoid that. In the quarry, the thickness of the right layer is not more than about 120 centimeters, and the statue is at least 150 cms wide. Over a hundred years ago they picked a horizontal piece of stone for that reason and put it straight up. This is known as standing layering. But this time I need to make a statue, in which the layers run horizontally. That can only happen if I make this statue out of two pieces. A body out of one piece, and a piece with the head and shoulders.

    Presawing

    presawing the new statue, step 2
    presawing the lower part, step 2

    I had already had some blocks of stone lying in the yard: a remaining piece of the Thomas torso and the second half of the block from which I've presawn Serge's angel. Those two pieces were not mine, but they belonged to St John's. After consultation it was decided that I could use these two blocks for this statue. I started reconstructing the missing parts with plastiline clay. Next up was the presawing of the lower body, in three steps from coarse to fine. This was followed by the same process for the upper body.

    Next step

    After this will come the rough carving of the two pieces, at the point where the seam should be. The plan is to follow the lower line of the cross on the chasuble of the pope. It will be a rather difficult job! Read the continuation of this interesting challenge in the next article about this image.

    presawing head of the new statue, step 2
    Presawing the shoulders and head, step 2
    presawing the new statue, step 3
    presawing lower body ready
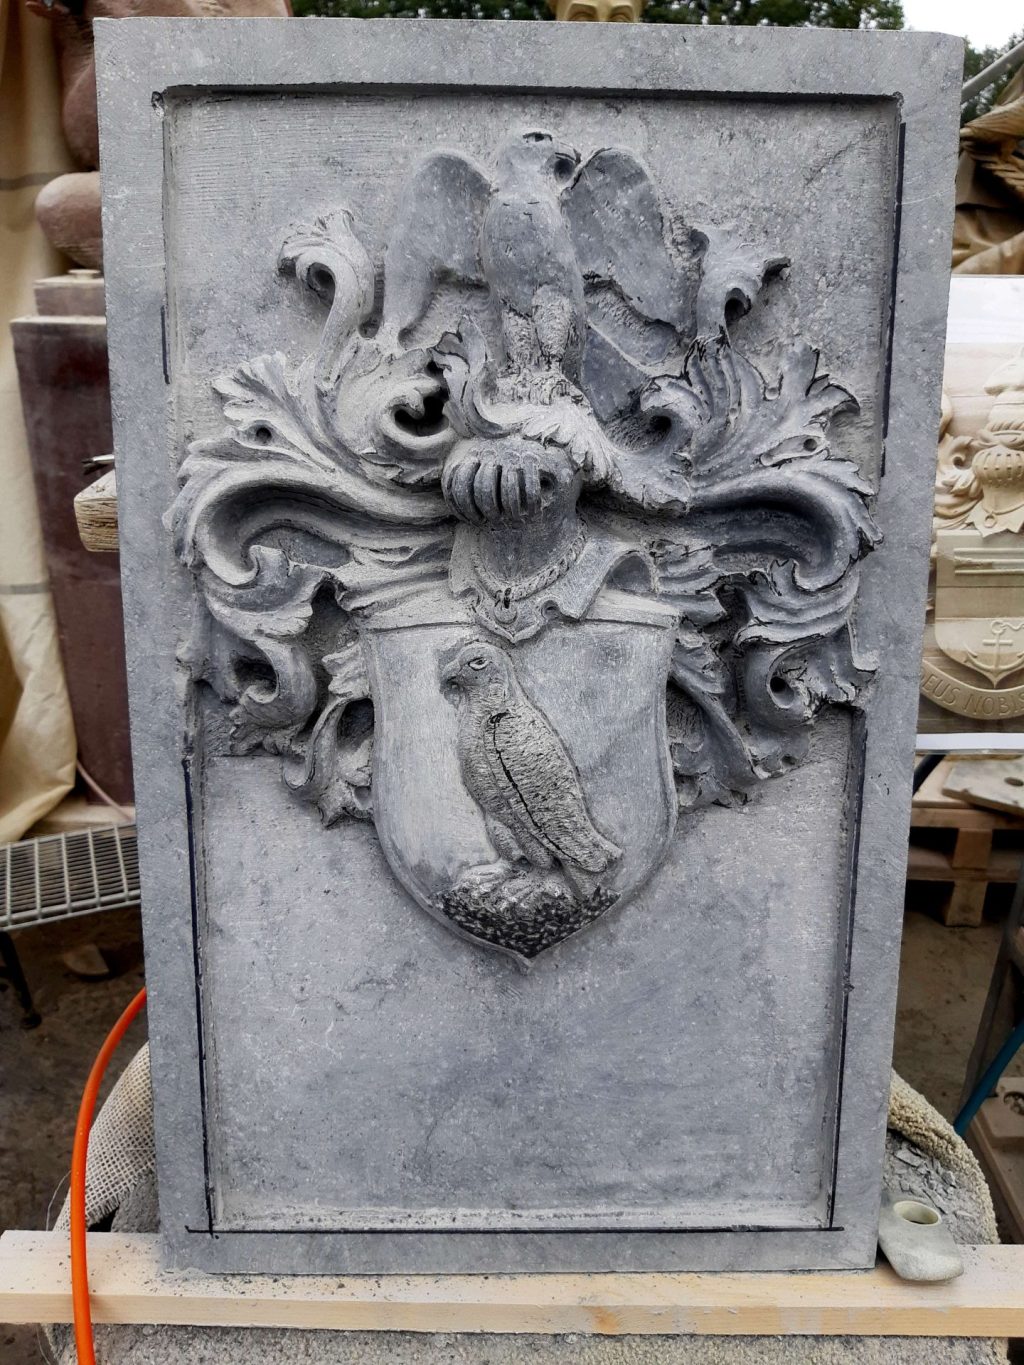
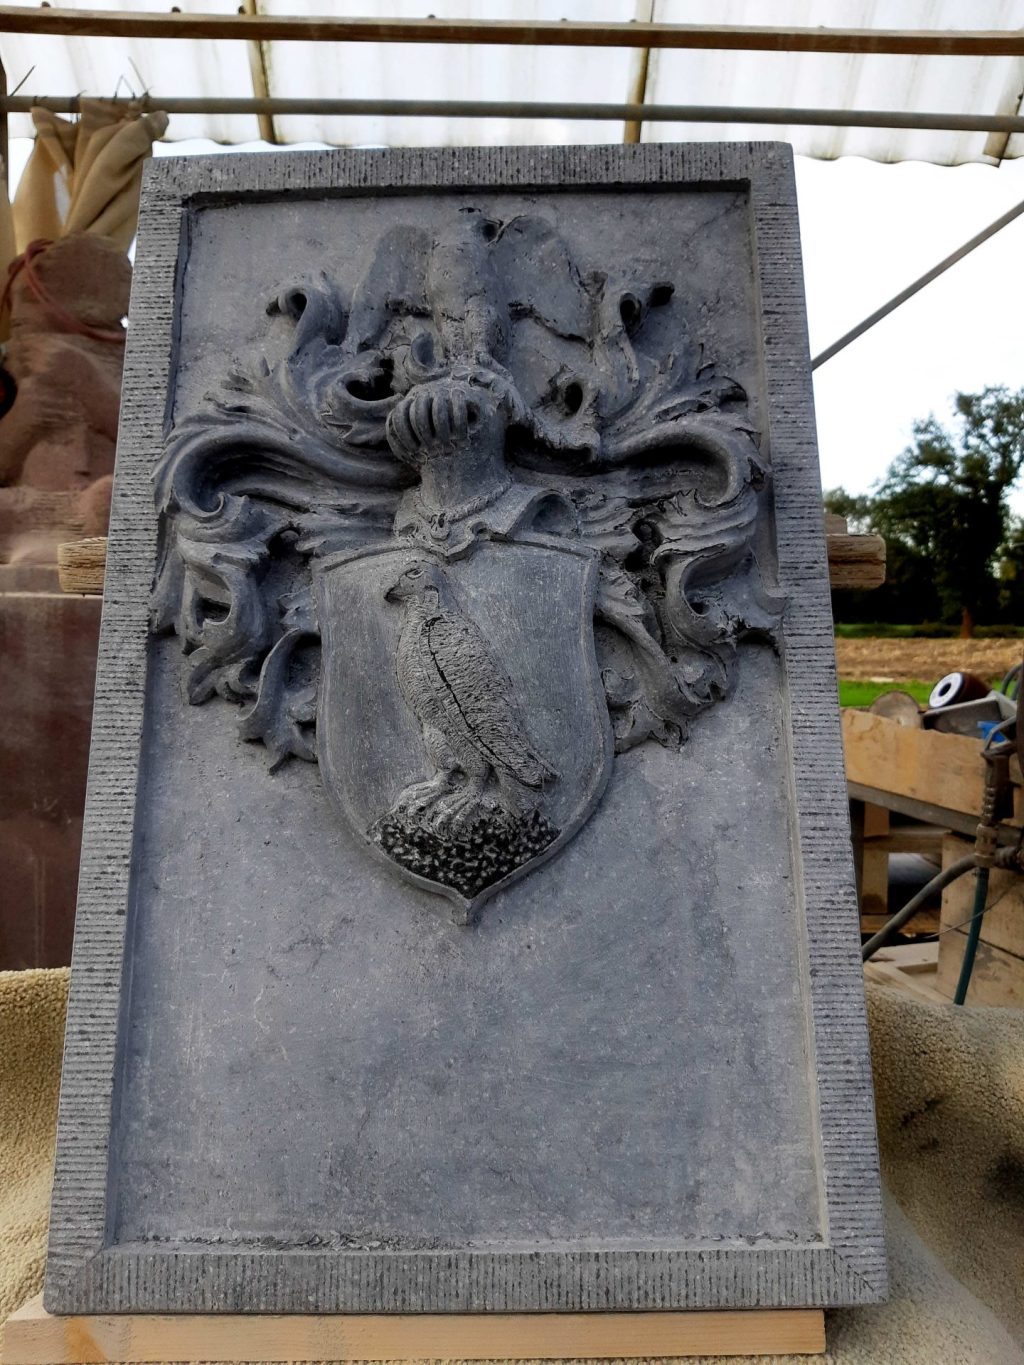
  • A bluestone coat of arms with two falcons

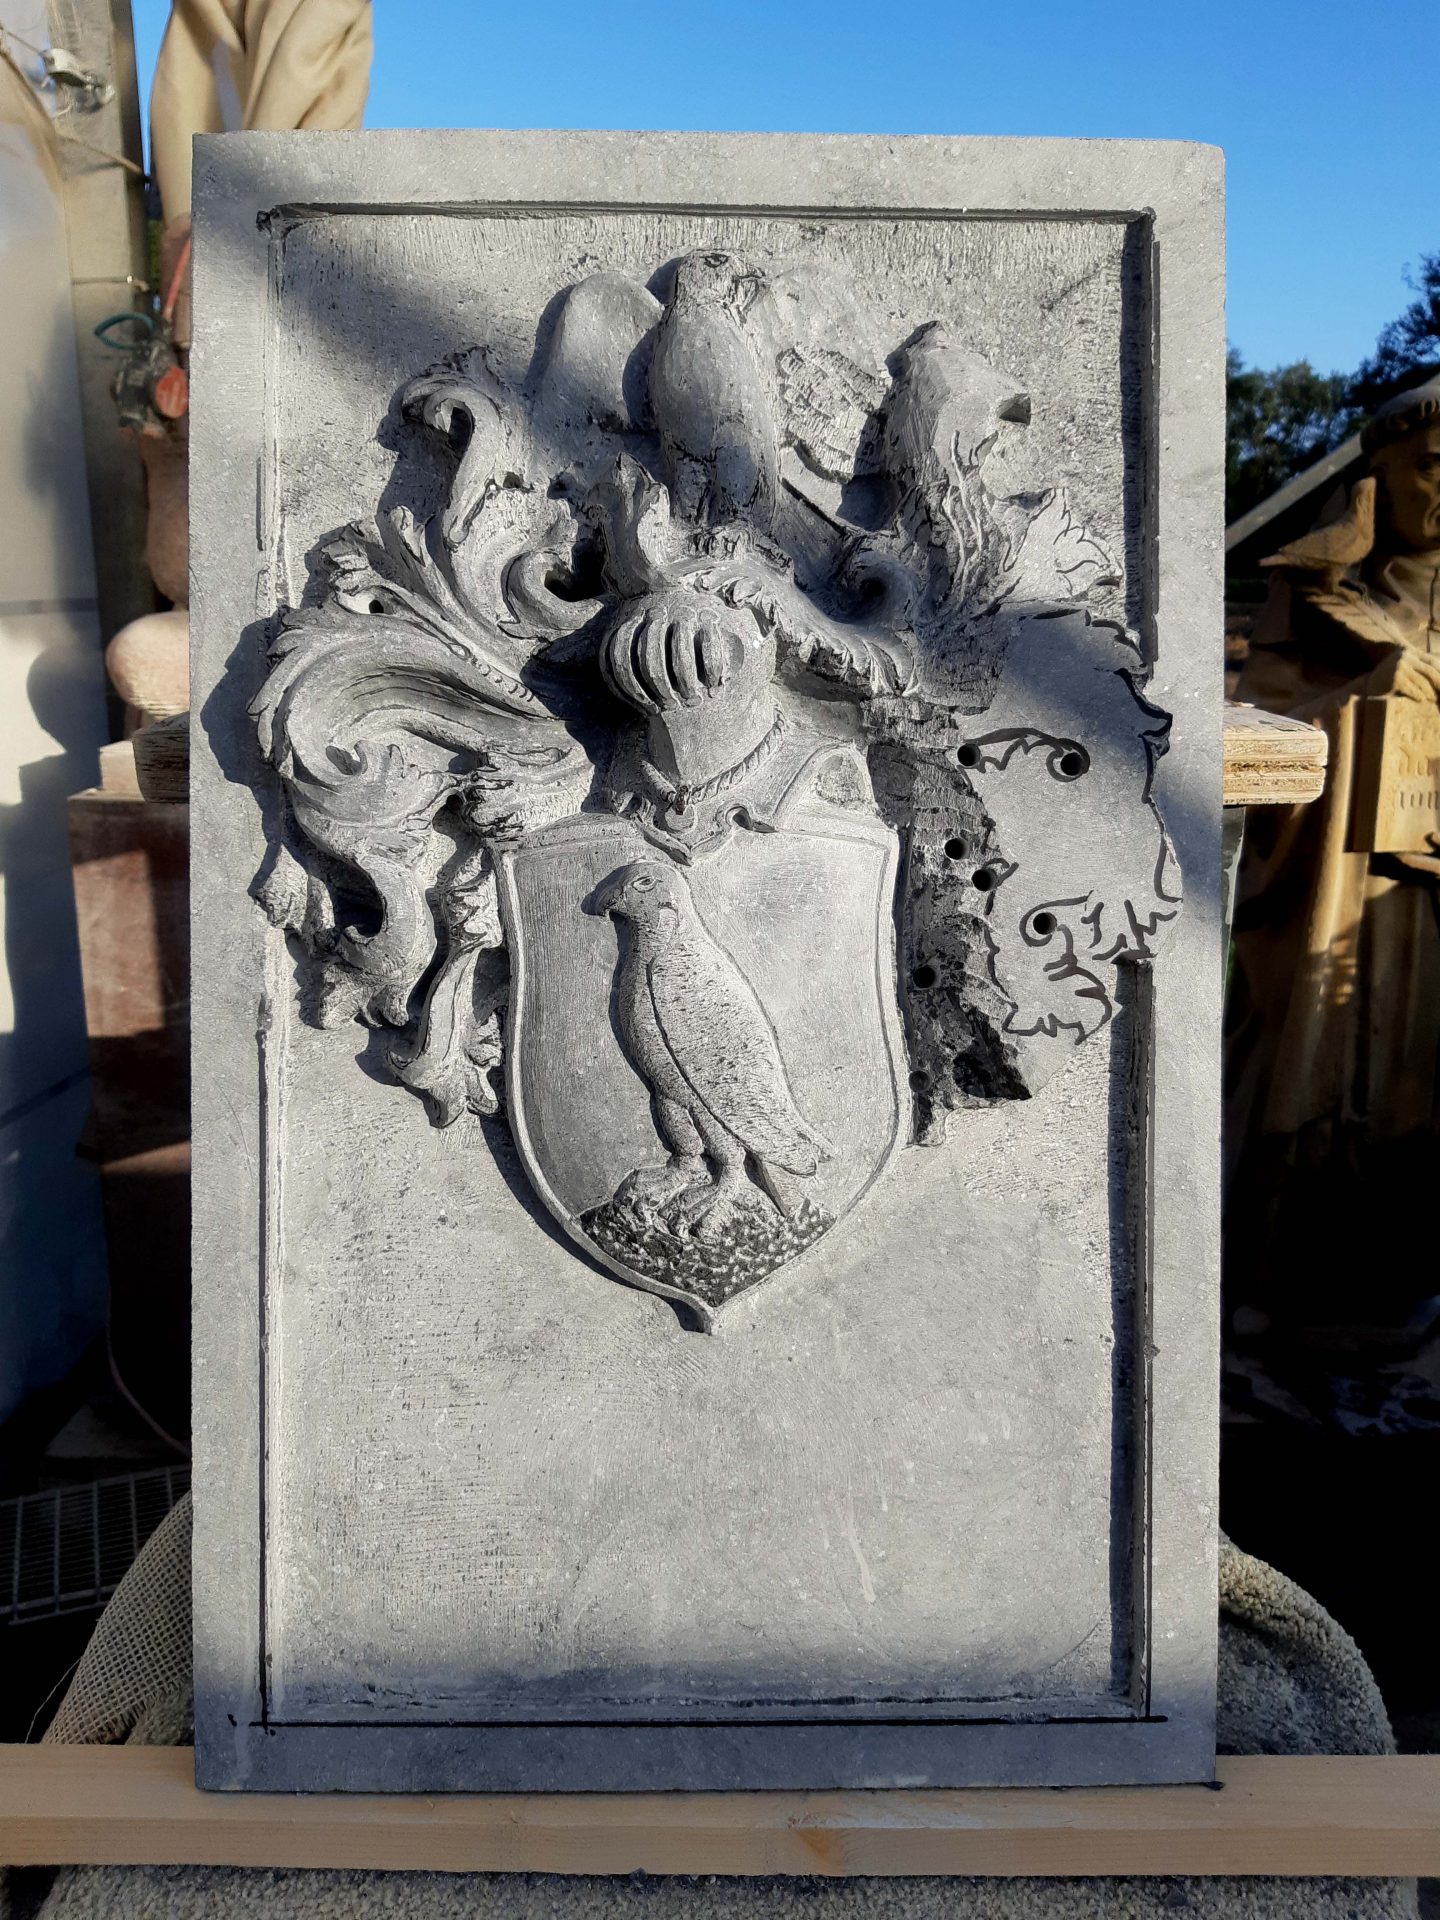
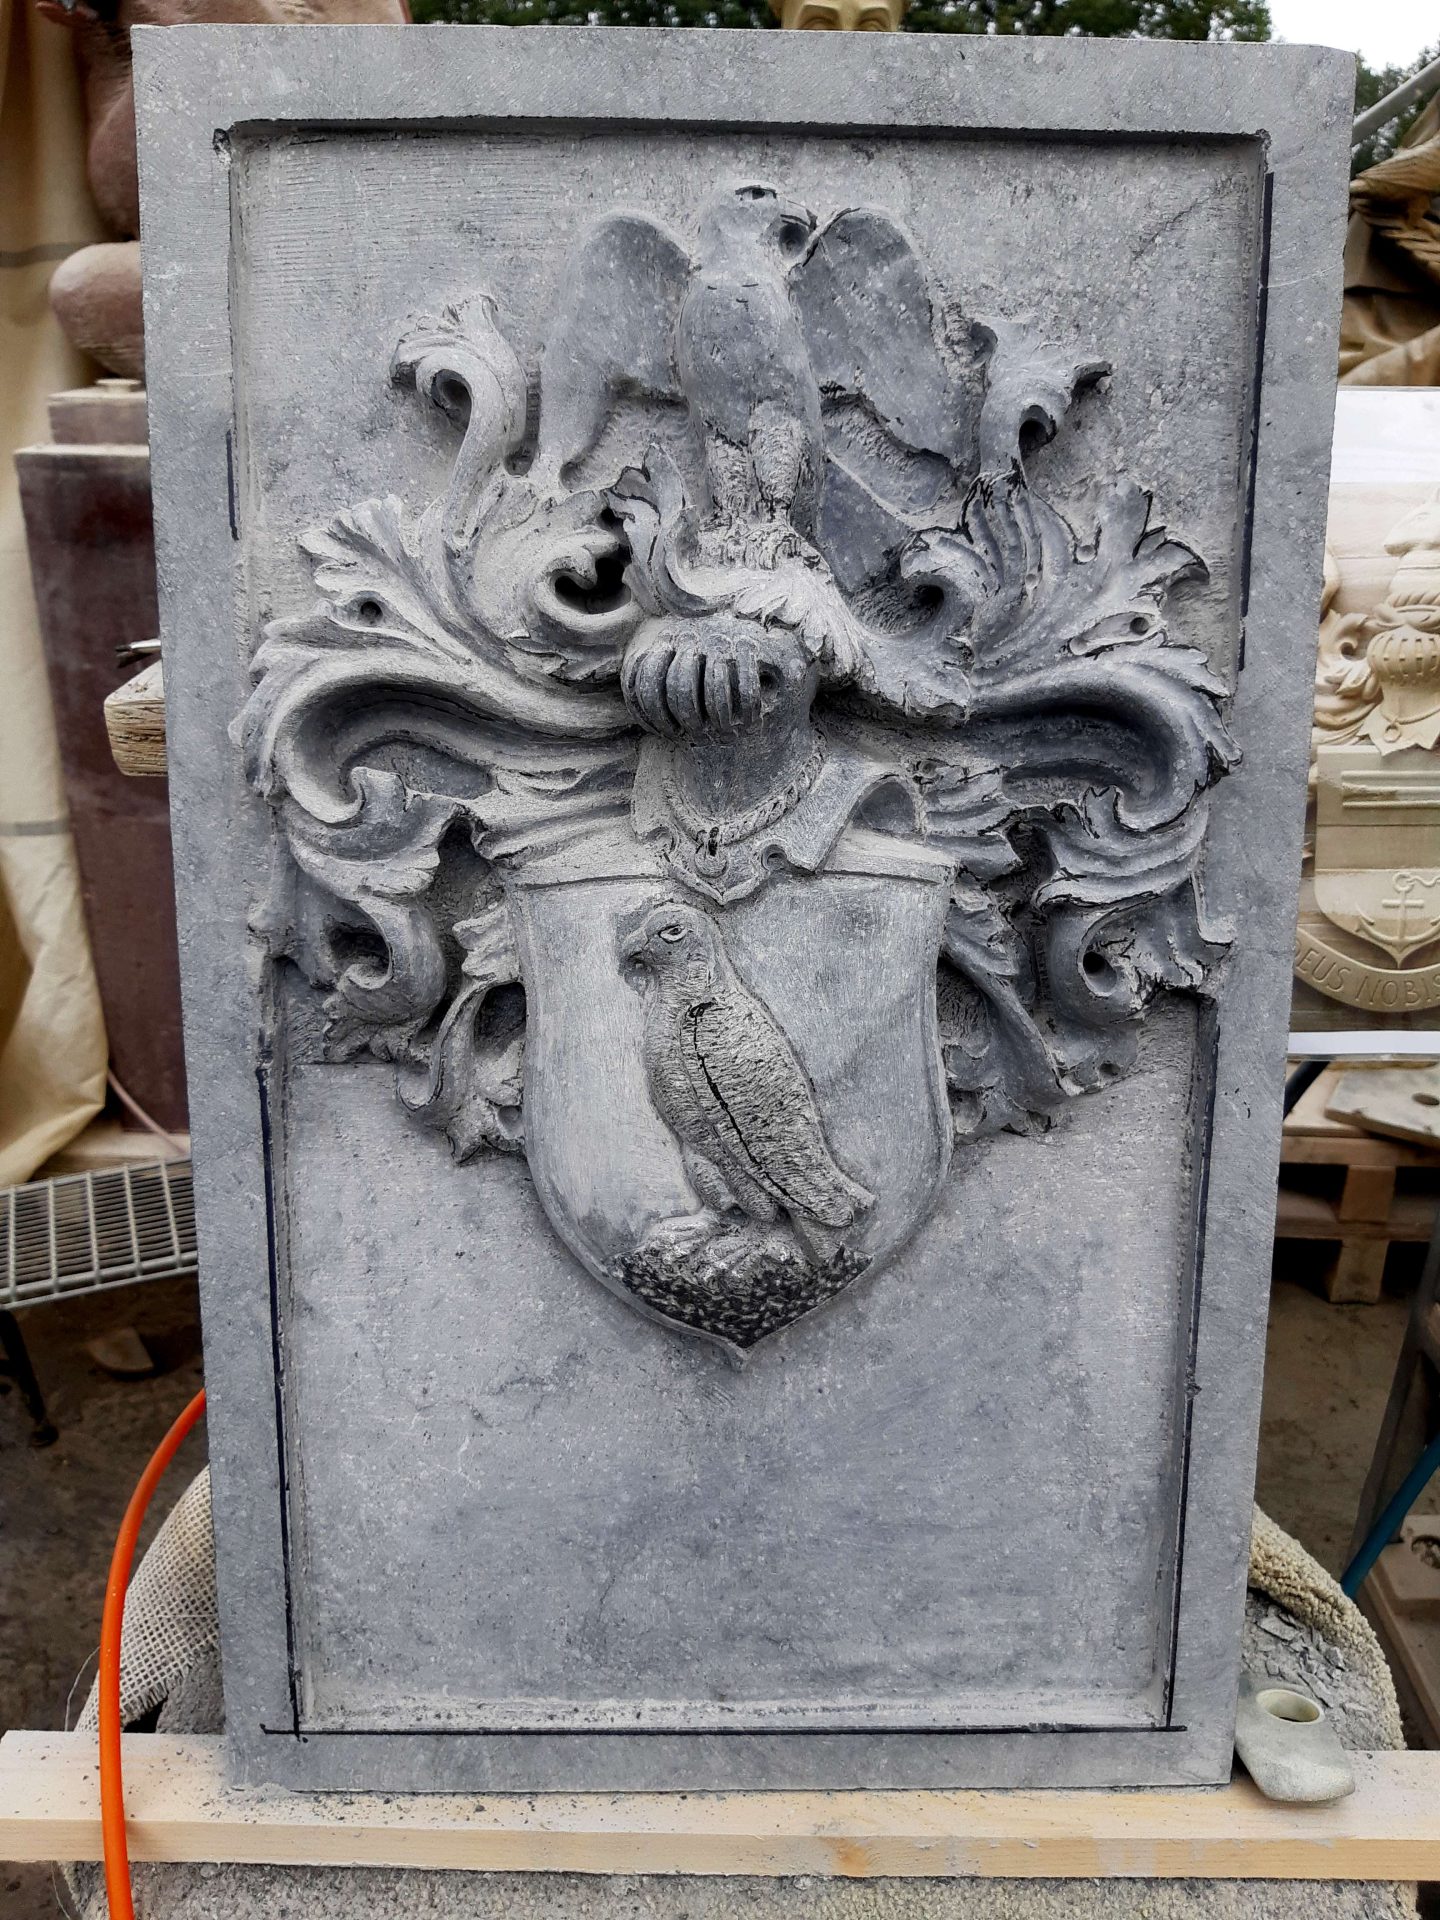
    Bluestone stone coat of arms

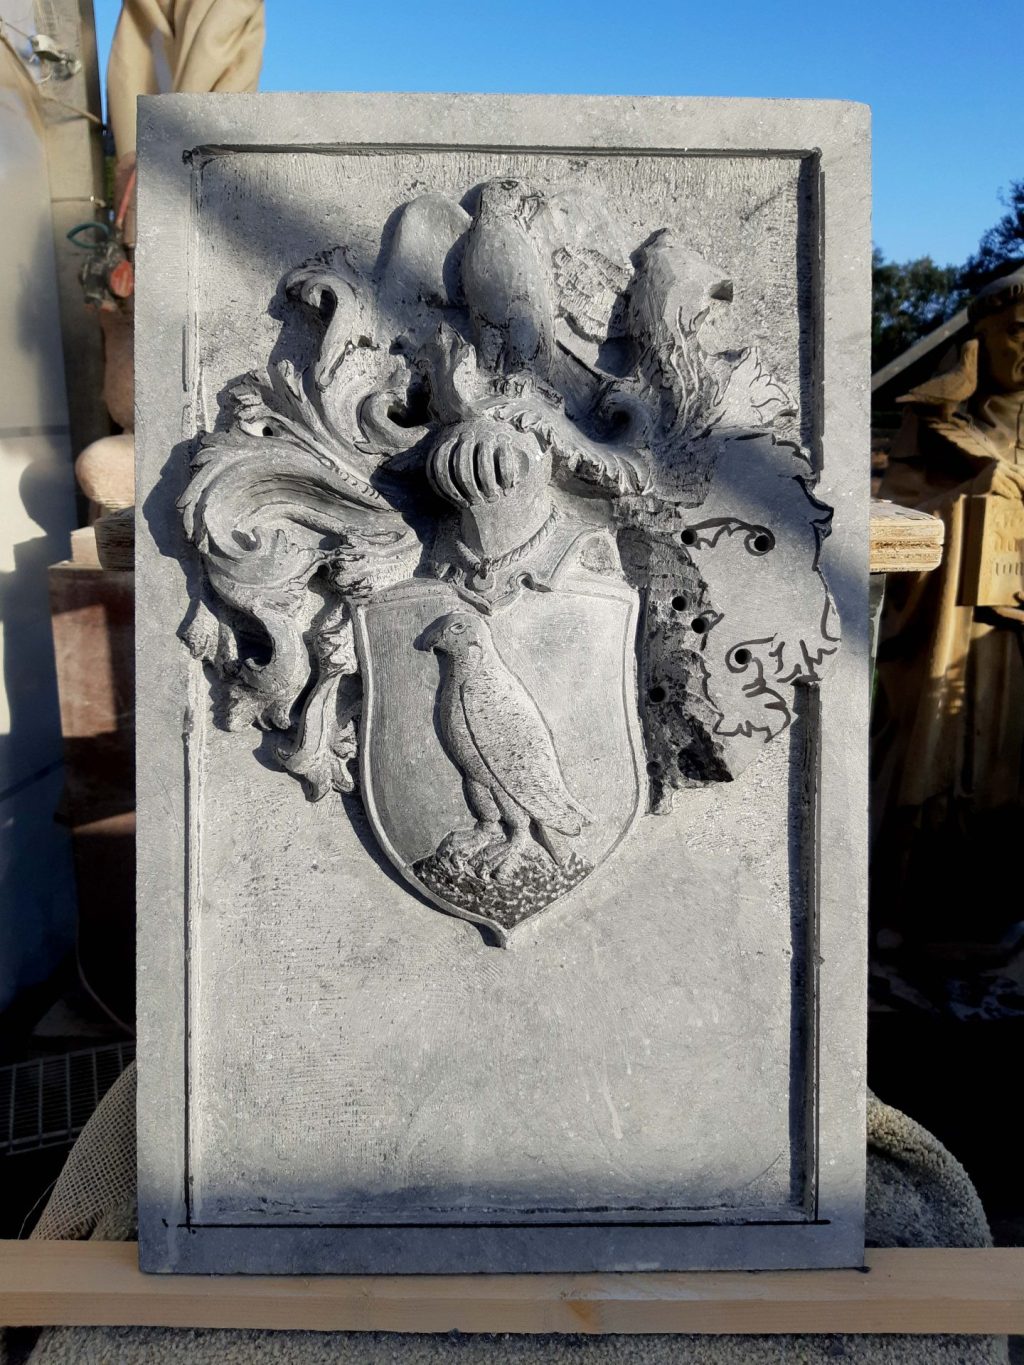
    I merrily went on to the next commission, another stone coat of arms this time. The previous one was a smaller relief with only the shield. That required a little more attention to the shape of the shield, to make the design a bit more interesting. But this coat of arms is quite extensive in itself because of the helmet, the mantling and the crest. I prefer deeply carved coats of arms, and this is no exception: the total depth of the relief is eight centimeters.

    The customer lives in Belgium and has renovated a house that already had a plaque of Belgian bluestone in its façade. Hence, this plaque will have the same size, 41 x 66 cm. It is of course a fairly elongated measure, whereas the actual coat of arms occupies a more or less square space. So this leaves some space for a Latin text underneath the emblem. I'll get to carve that next week.

    The rough shape

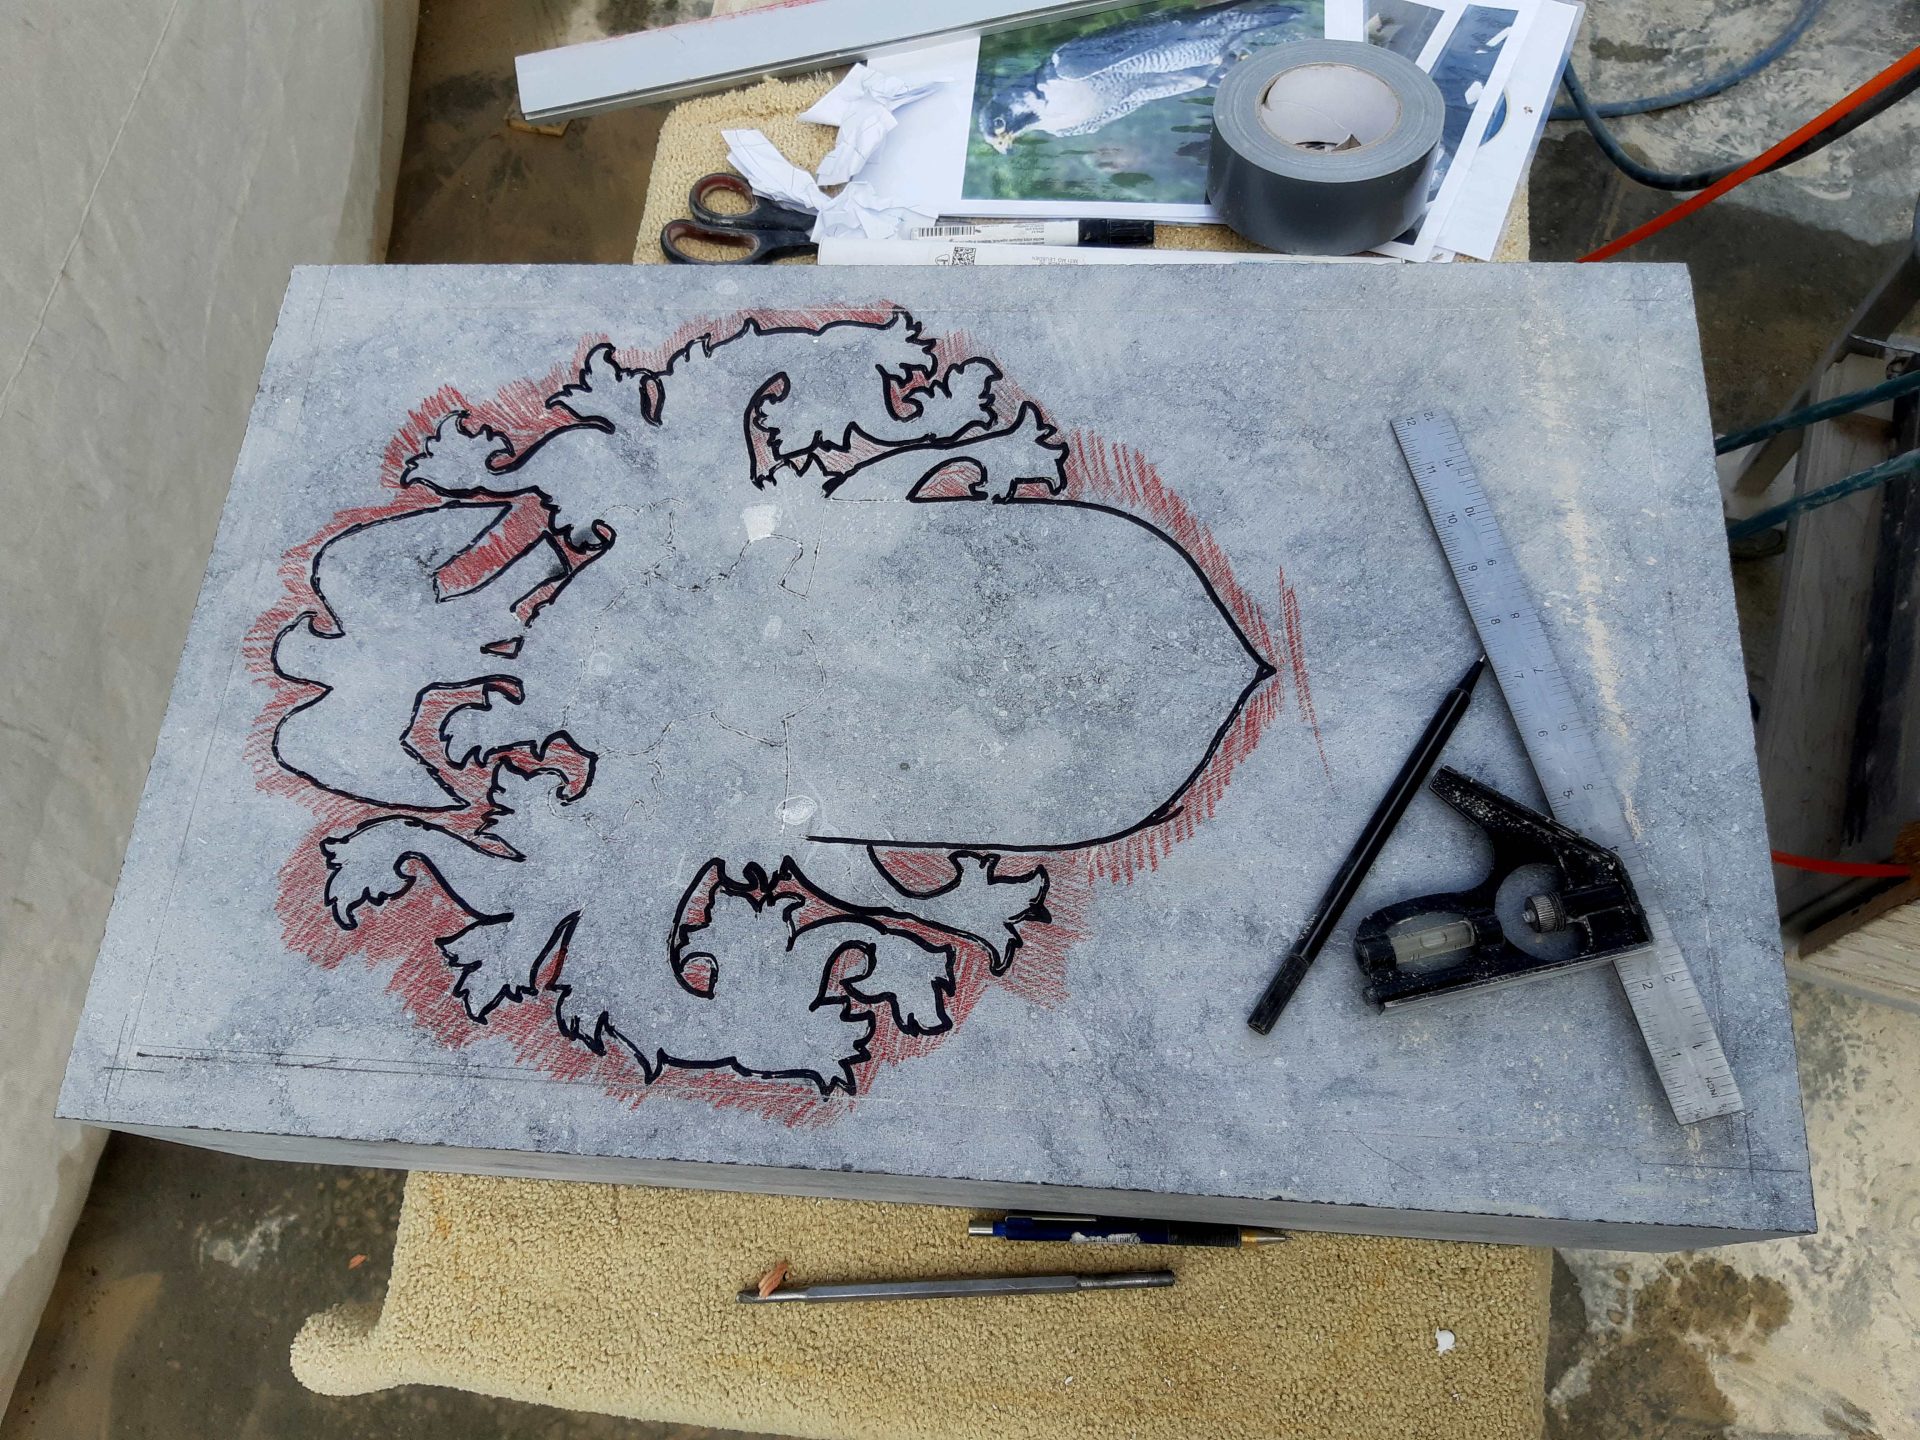
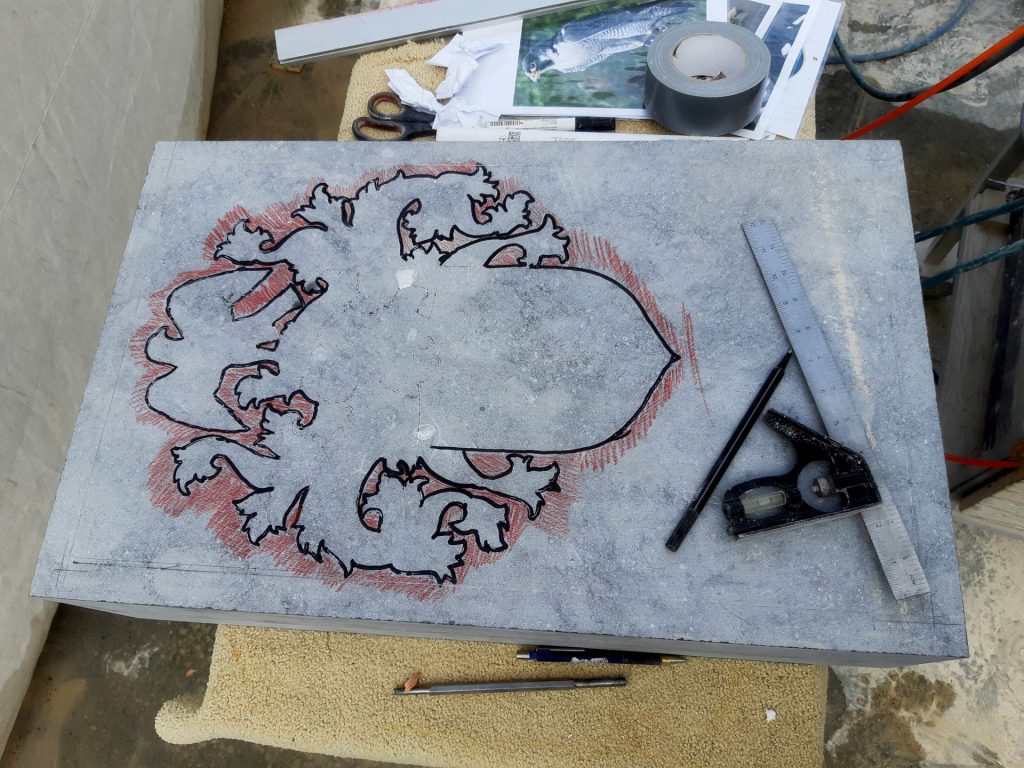
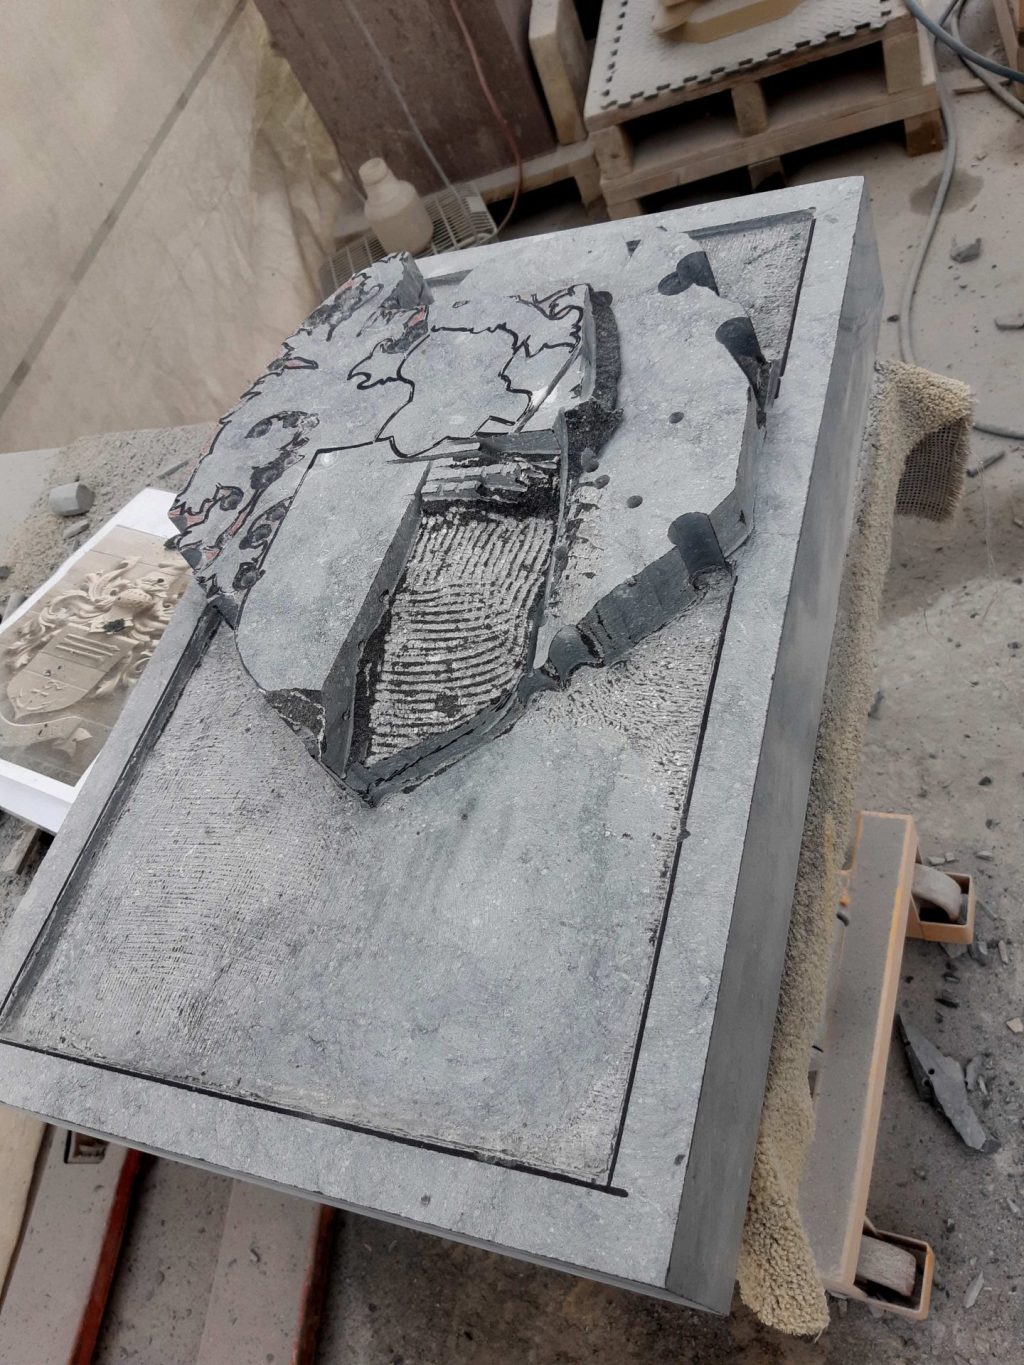
    family crest transferring the drawing on bluestone

    I first started with transferring the drawing onto the stone. I never fuss about that: I just stick the print onto the stone and carve the lines into the stone, right through the paper. Hoopla.

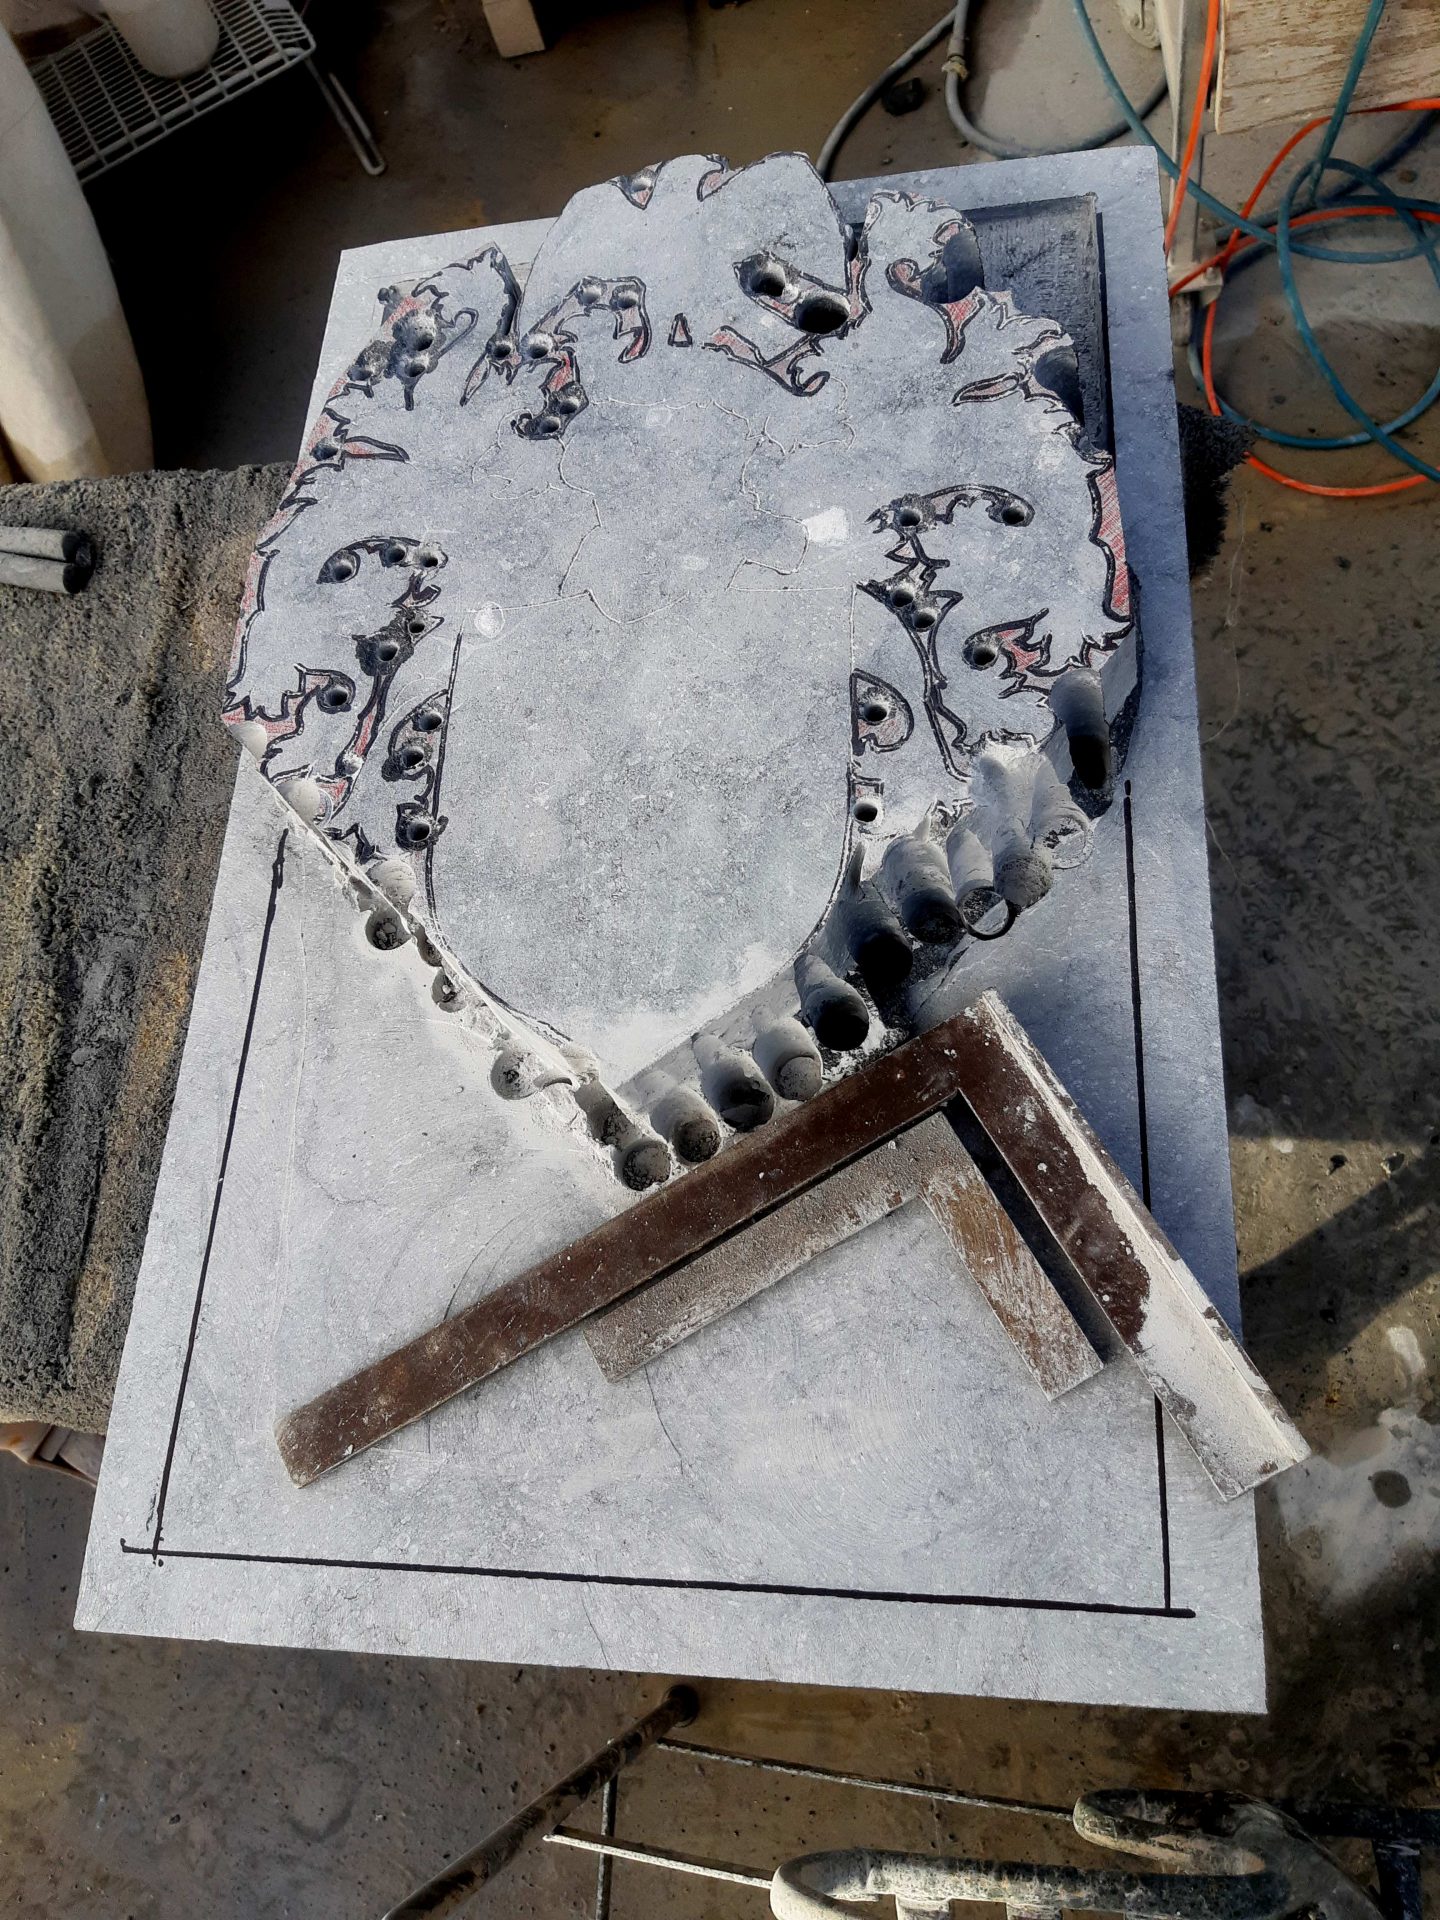
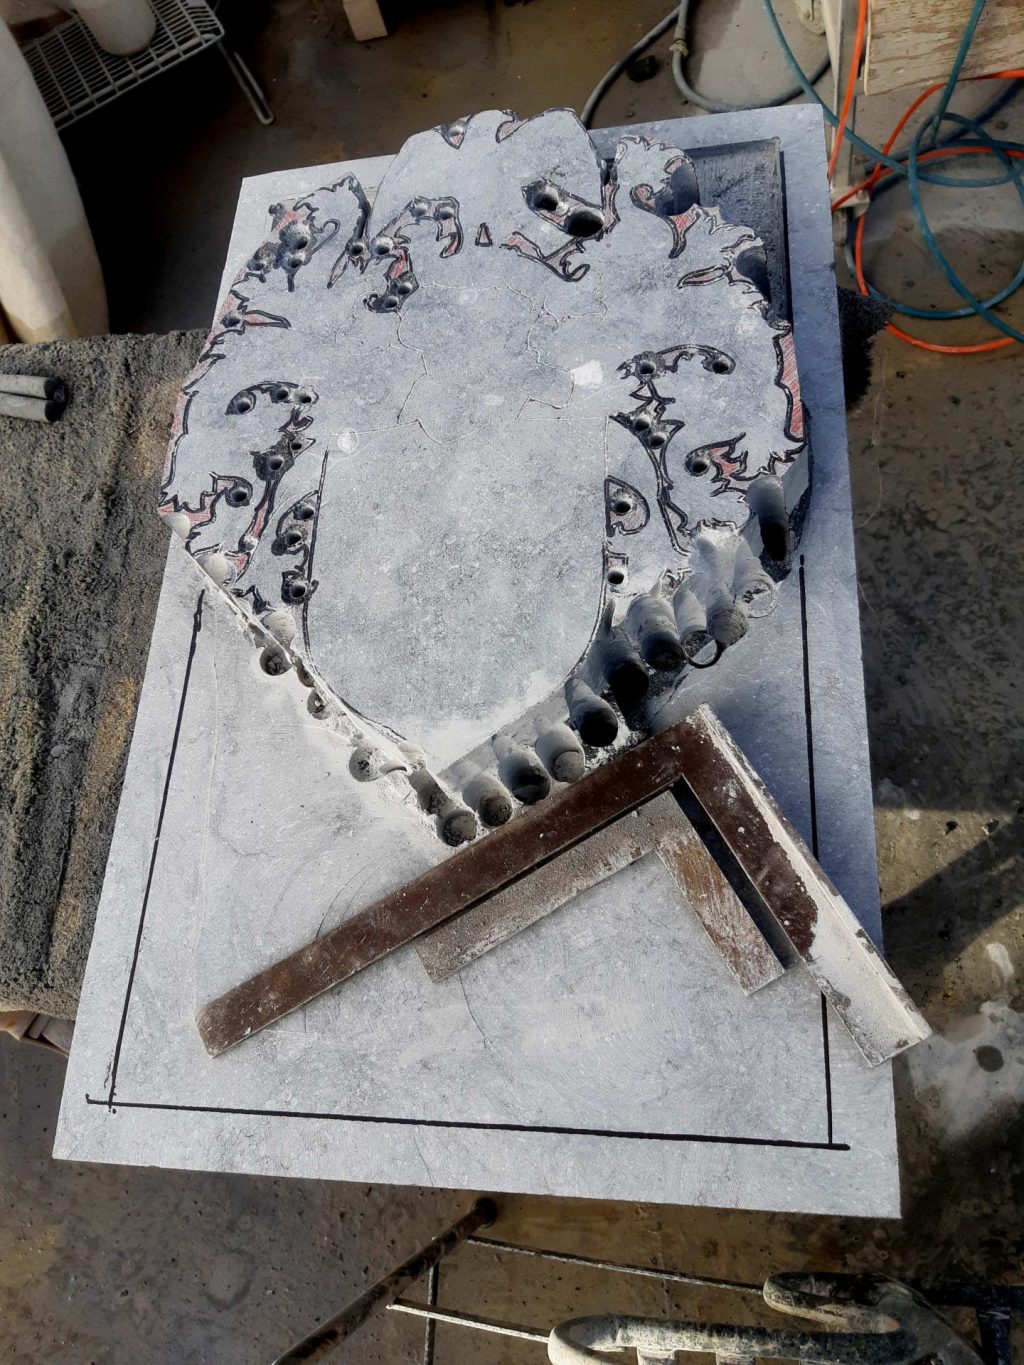
    From woodcarvers I learned to first jigsaw out the contours. That way, you'll have these parts defined already and you can continue to trust in them. Now doing that in stone, and certainly in Belgian bluestone or arduin as the Flemish say, is a bit harder to do, but it remains a good plan. Using the drill, I could define the shapes and also the depth of the background plane for a number of spots (quick and easy) in one go.

    To keep margin for errors, or not?

    bluestone coat of arms-drilling the contours

    The rough carving of a relief is quite a bit different than that of a freestanding sculpture. When carving a sculpture, it'll be useful to have some margins in case you'll make a mistake. That is, you'd make sure you don't make anything definitive yet during the rough carving phase, so for example you'll still be able to move the limbs a little in case it is not quite to your liking. In relief carving that would not be convenient. You'd keep searching over and over again where all these frills should go if you wouldn't set any hard borders. By carving the parts straight down at right angles to the background plane from the beginning, the exact location of each component remains defined right up to the end, even if you start shaping its height with a coarse tooth chisel. The margins that you always need as a sculptor lie in the depth in this case. For you could always encounter a bad piece of stone, or you could make a mistake. In relief carving, parts can often be placed a bit deeper without too much damage.

    Assigning the volumes

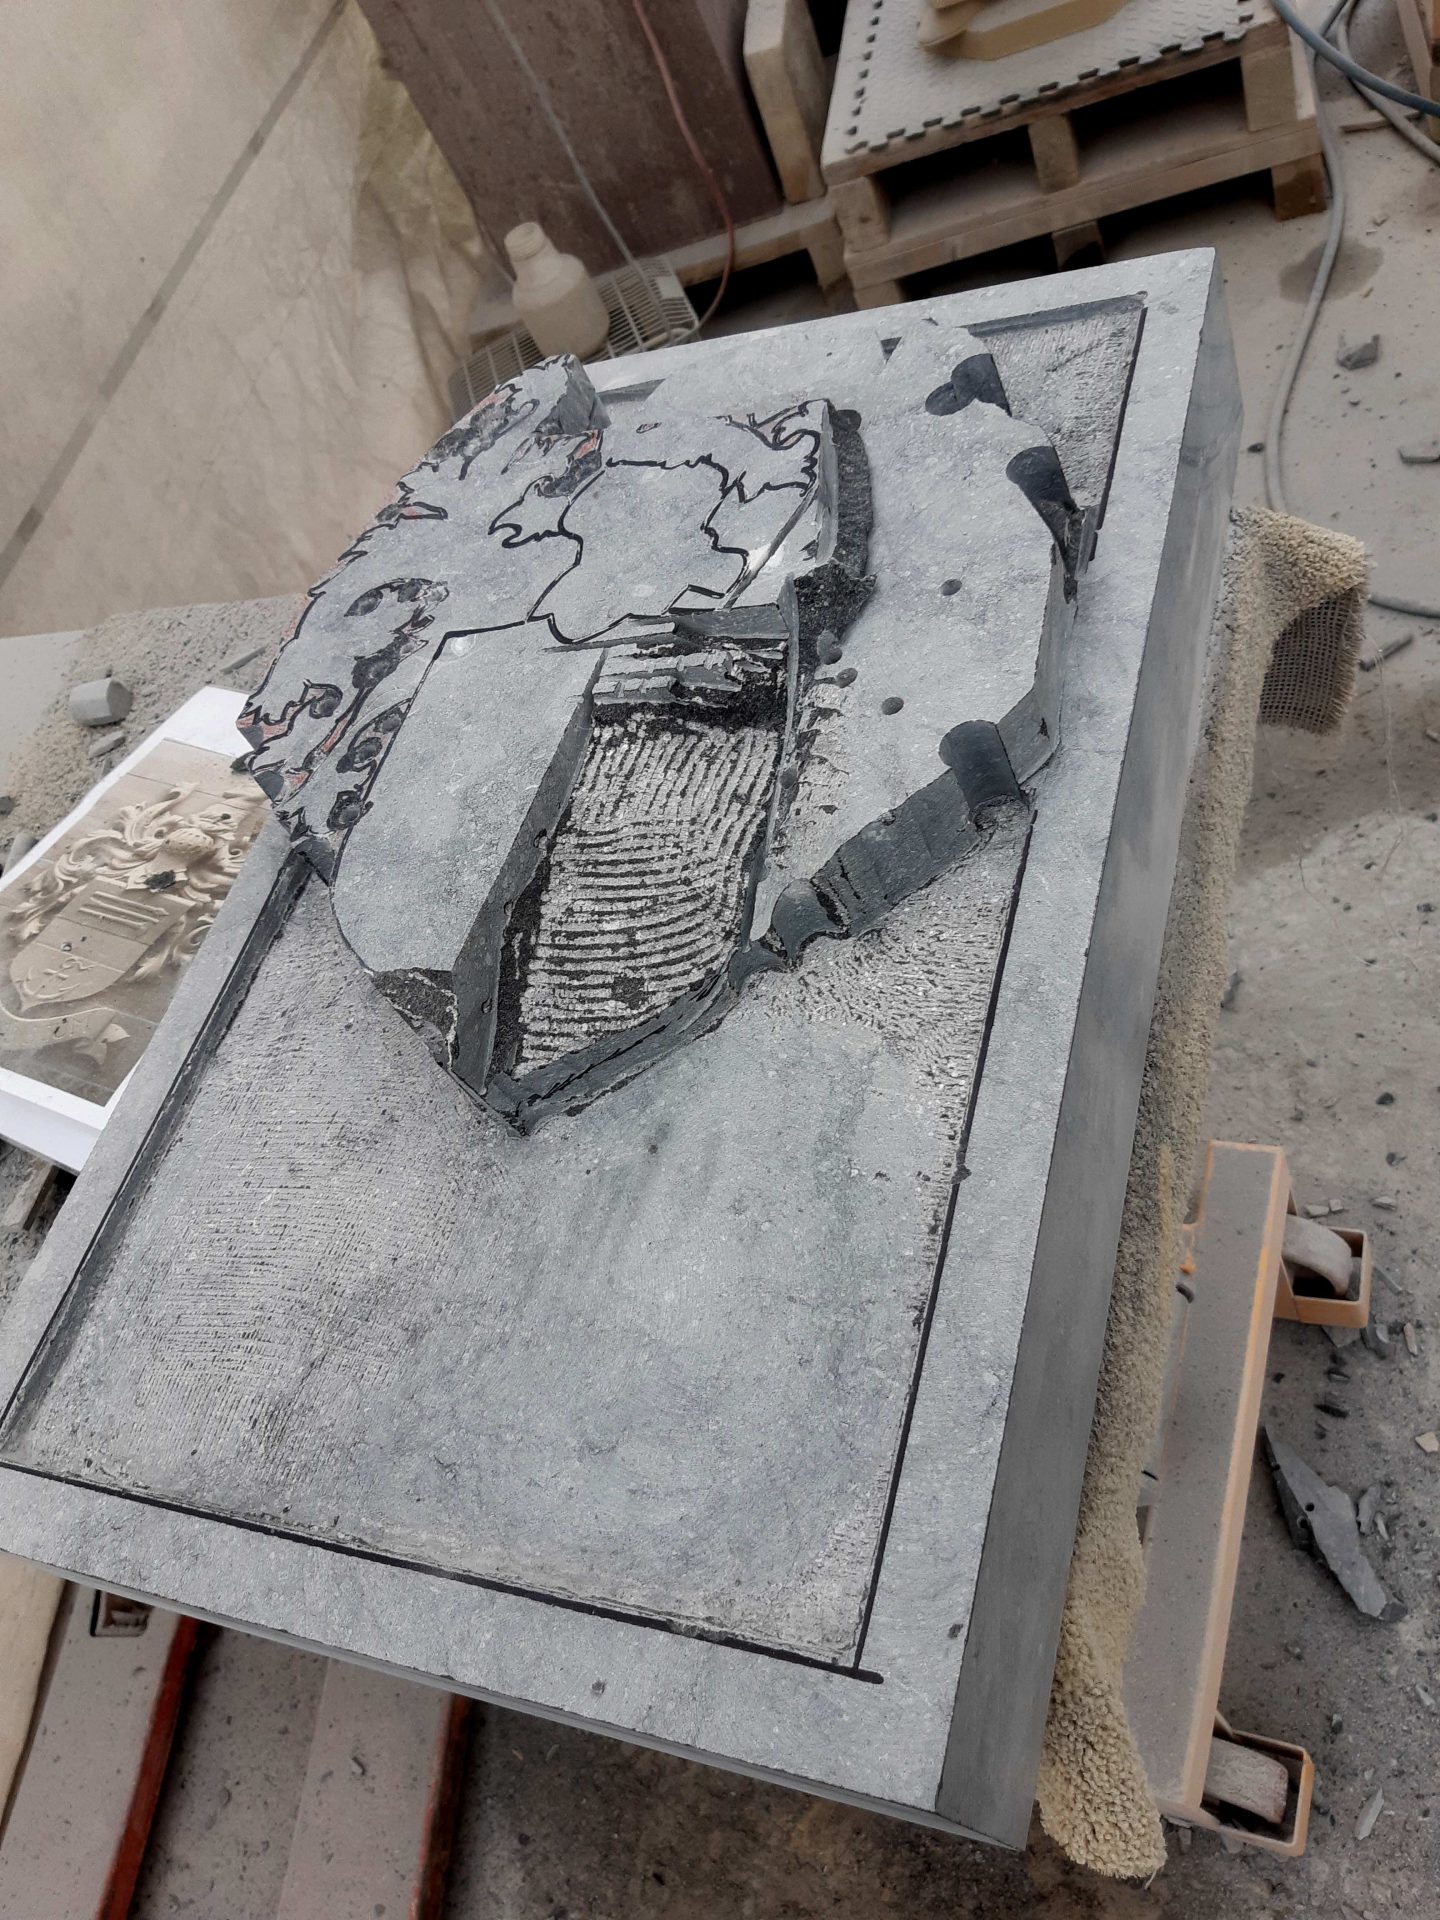
    bluestone family crest: defining the volumes

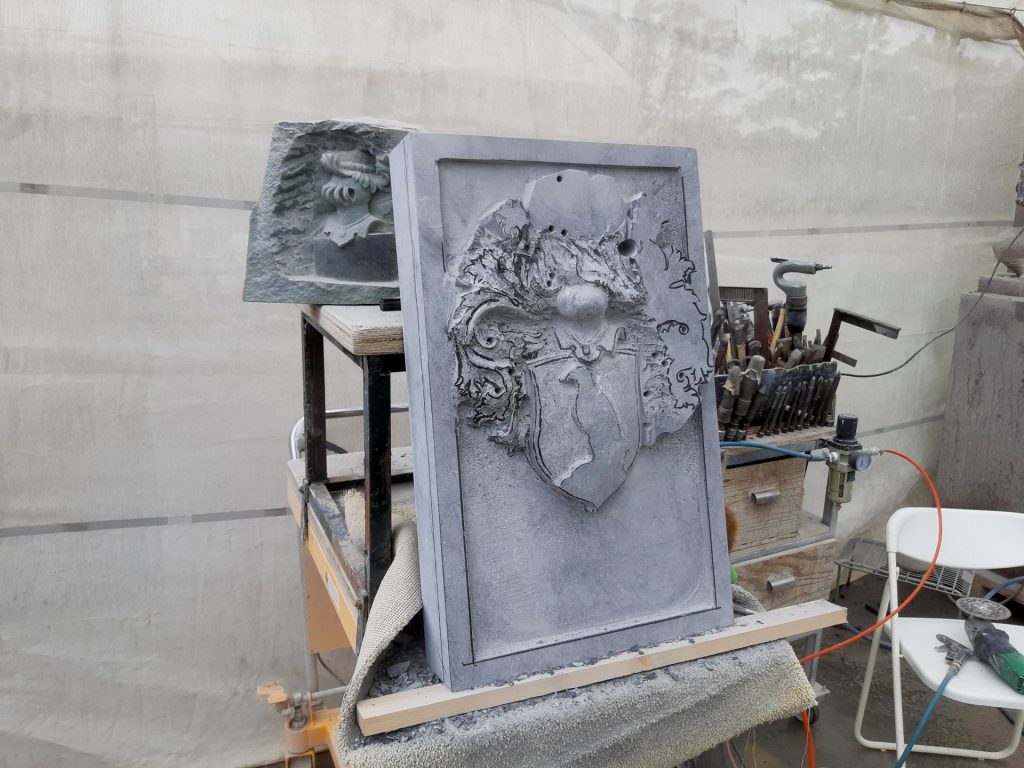
    I have previously written about it: the next step is determining the heights of the various parts. In this case the helmet will be the most protruding part. I wanted to keep the mantling at the left and right below the level of the helmet, the shield should be covered by the helmet and consequently end up lower as well, and the lowest point are the tips of the mantling and especially the crest.

    I just make those decisions by eye. I picked up the grinder and quickly cut down the planes of the mantling to a lower level. Then I once again drew on the lines of the shield , took into account the depiction on the shield, and carved it into the right curve.

    Luckily I had made just such a little helmet before, in dolomite stone, and that one was still on the wall. With that piece next to it, it was quite easy to shape the helmet.

    Playing

    family crest rough carving

    Once I had rough carved all of these parts to their proper height, the best part came. This is why I love carving coats of arms so much. I'm sorry for the customers, but I'm not really into heraldry all that much or coats of arms as such. To me, family sure is important, but I'm not so concerned with ancestors and descendants. Other than gratitude for what they have given and for what beautiful things they'll be going to bring after I'm gone, it actually doesn't go any deeper for me.

    bluestone coat of arms detailing

    But the cárving of these crest reliefs is what I love to do! And that is because of all the lines and movement in the design. The clear shapes of the helmet and shield, in contrast to the elegant curves of the mantling… for me it's a each time again a play with lines and volumes. That's why I never make a maquette of these things. I just start, and let the lines lead me to the shape. It should of course end up looking somewhat symmetrical, so I usually first carve one side and then do the same thing mirrored on the other side.

    Halfway through: finishing

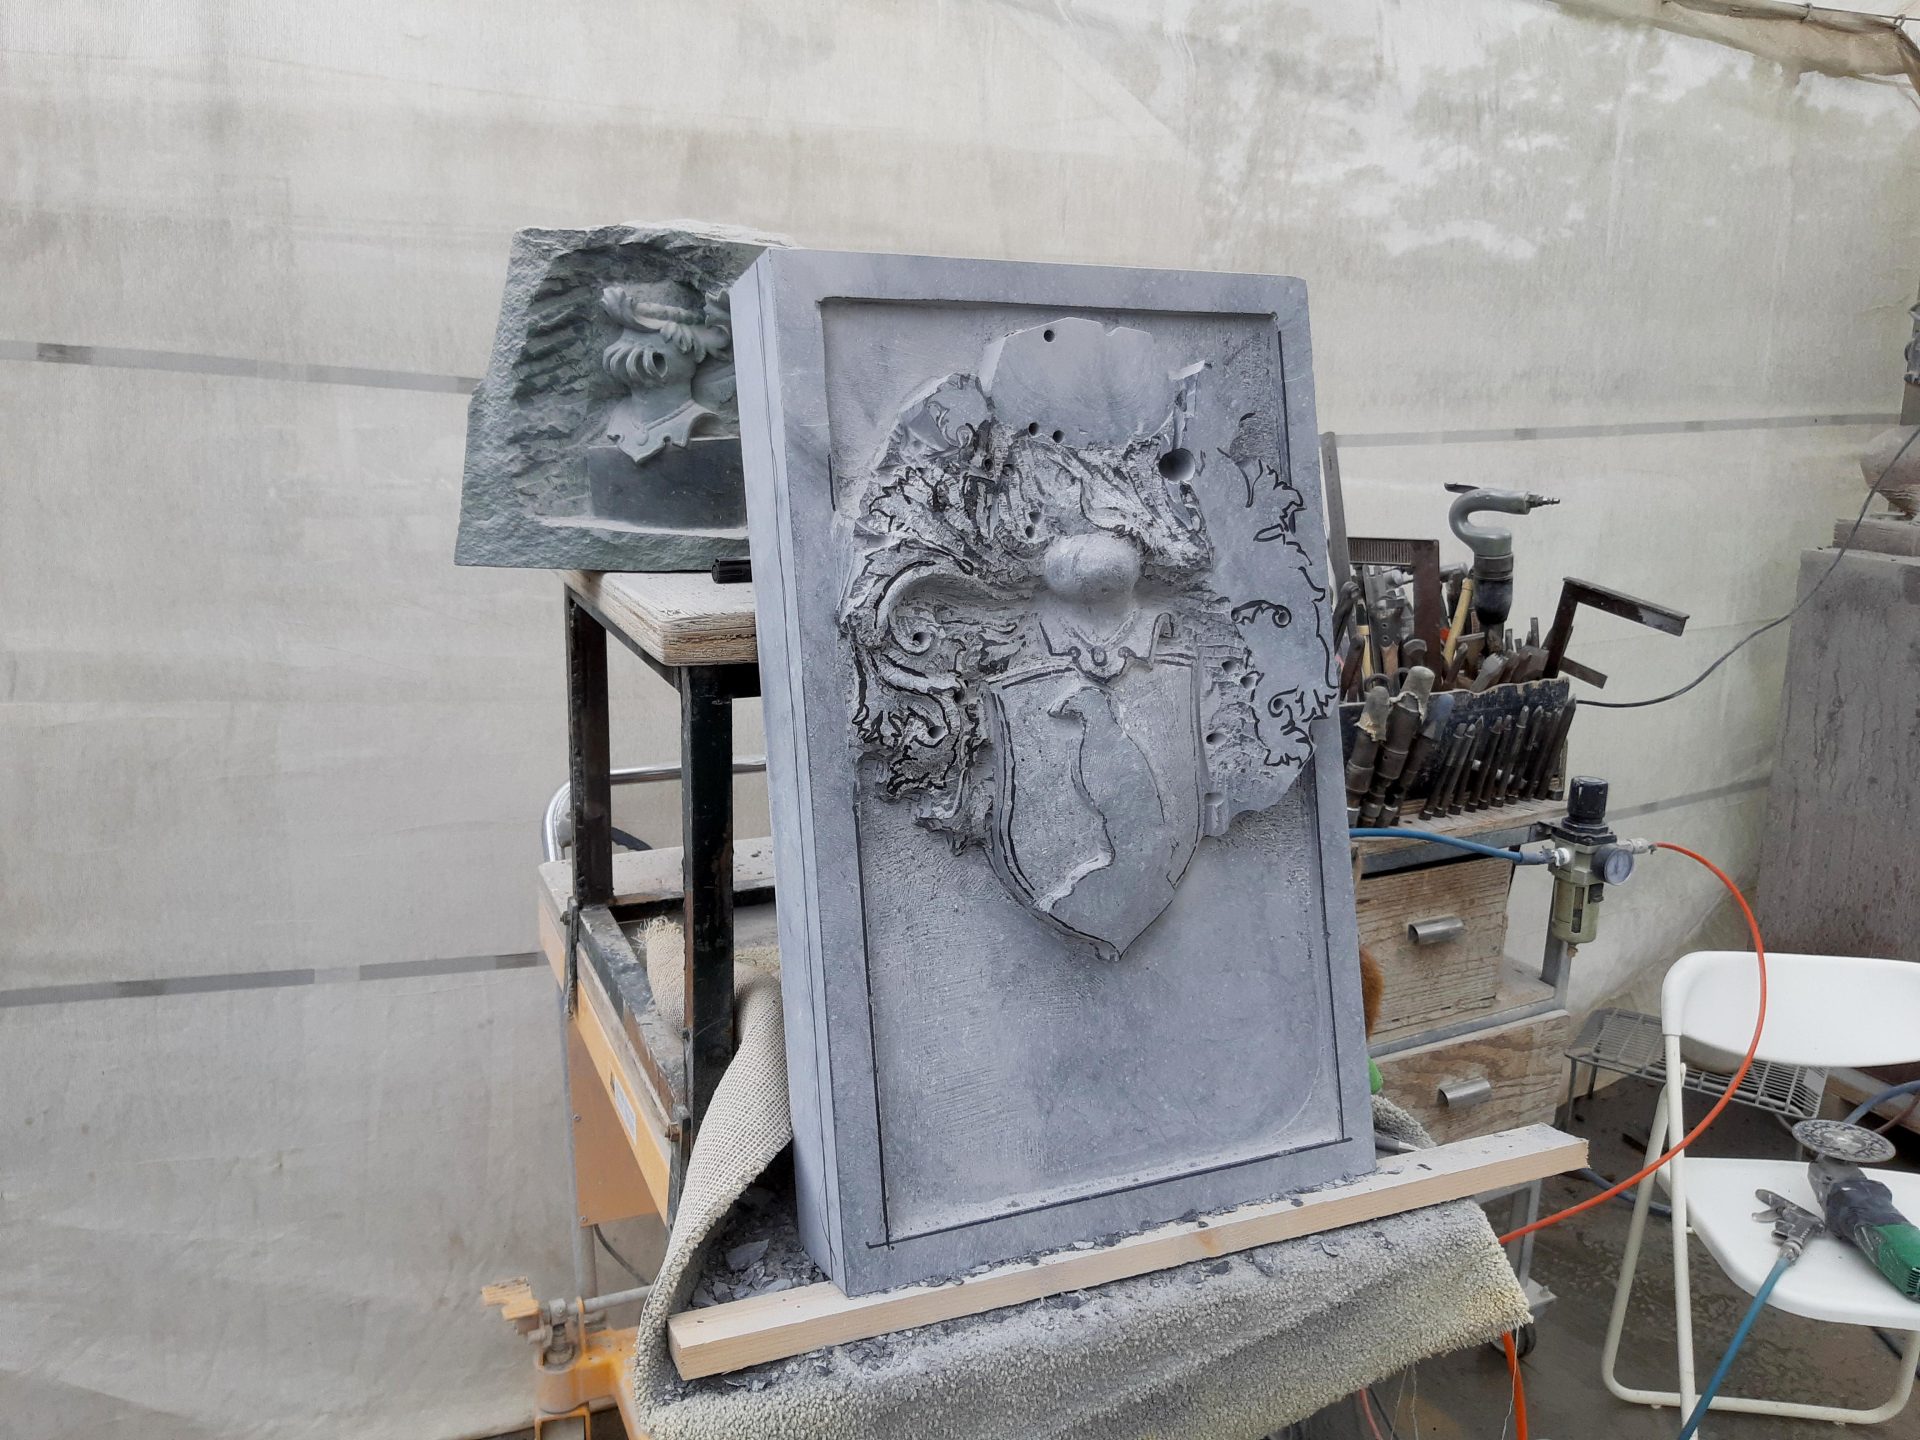
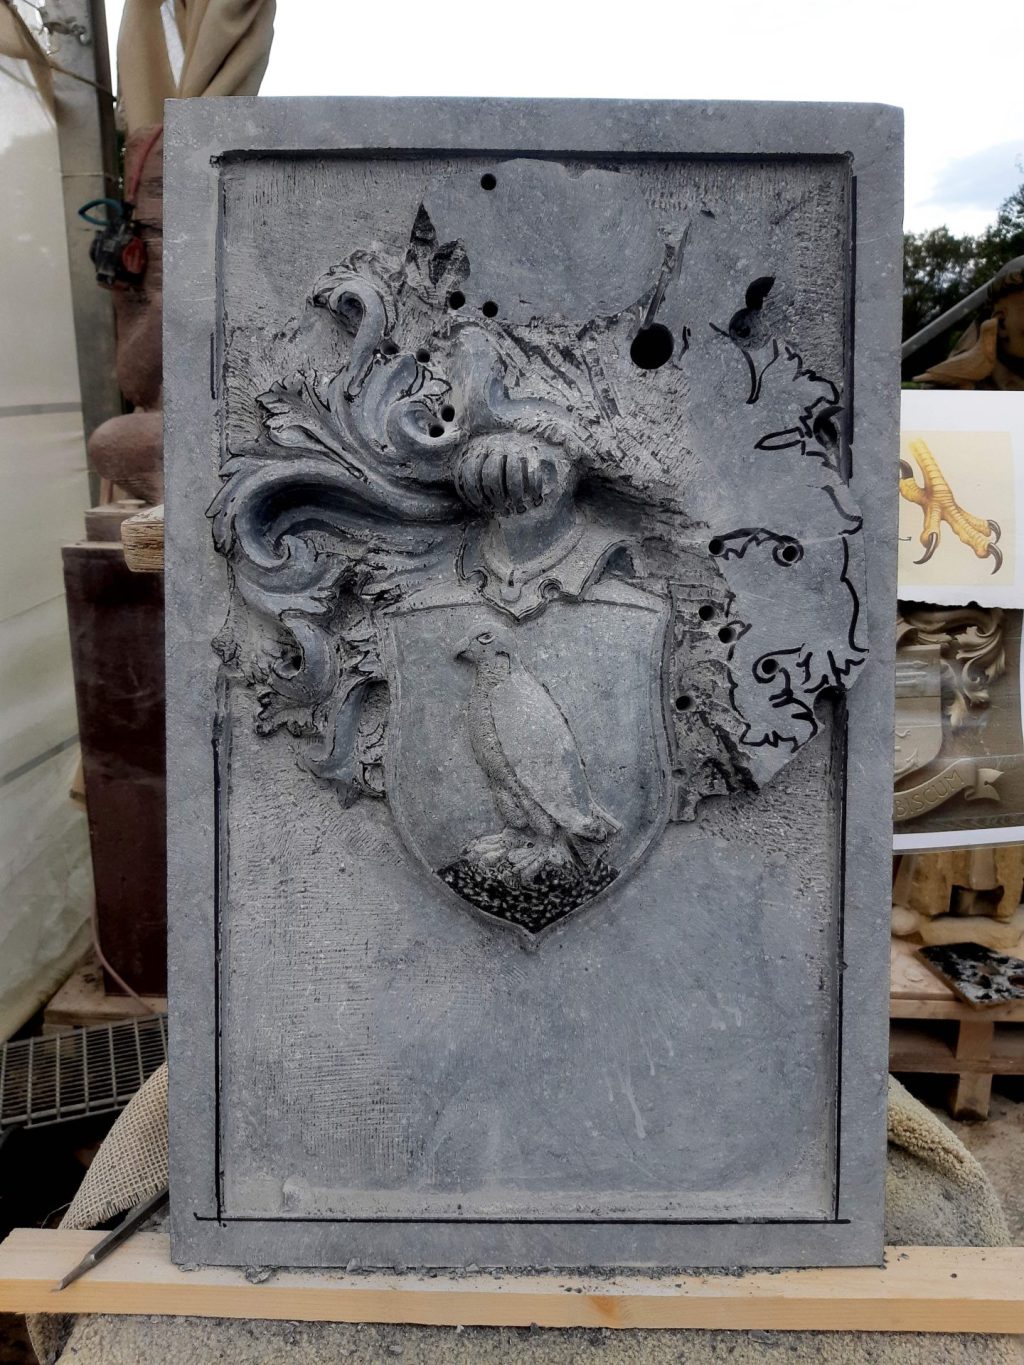
    bluestone family crest: halfway carving process

    Once all the shapes are just about right, the detailing and finishing of the stone coat of arms starts. That is usually what takes the most time. I tapered the shield a little bit to make it all a bit more playful, and also gave it a good bulge, in order to give it some tension. But everything needs to be crisp in the end, otherwise it will end up as a complete mess and not easy to read. So next week I'll still be working a long time making it all crisp and sharp, and with carving the letters. And the edge still needs to be carved straight.

    Timelapse in photos.

    Read more in the following report ↑

No more messages to show.

No more messages to show.