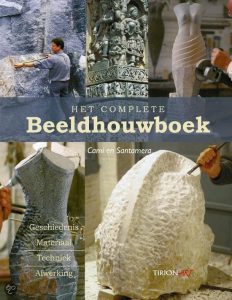
-Sorry folks, this is only for Dutch language readers... It's about this book: https://www.amazon.co.uk/Sculpture-Stone-Cami-Santamera/dp/0764154249.-
For a number of times now I've been recommending a particular book for beginning sculptors on this blog, as excellent teaching material to learn how to transfer your design onto in a block of stone, whether enlarged or not (here, here, here and here for example).
But not to worry: beeldhouwerijblog.nl offers a solution! I still have a copy of this book at my disposition, and that is made available to the one with the most sculptural inspirations.
What should you do to obtain it?
Last month I launched a series of posts with the theme 'tips for beginning sculptors'. There was never the pretense that these tips would be comprehensive, so there is still room for improvement. And that is where you can add your share.
Are you interested in sculpting?
Are you not yet in possession of Het Complete Beeldhouwboek and would you like to own it?
Or: you do already own the book, but you would like to gift it to a family member or acquaintance?
Do you happen to have a good tip for beginning sculptors yourself?
This book will be sent to the person who has the best tip(s) about how a novice sculptor can learn to carve in stone. Do remember to explain to how this works for you and how you came by this tip.
You can submit until Sunday 29 May 2016. The submitted tips will be gathered in a new blog entry, so the more this is shared, the more interesting the story can become ;-).
Sorry, the book has already been won by Paul, see it next post
List of sculptor's supplies shops in the Netherlands
There are quite a number of places in the Netherlands where you can buy stone, chisels and much more, but there is quite a difference between stores that focus on sculptors in the broadest sense, and shops or workshops where you also can buy some articles for stone sculpture. But that can easily be seen from their websites. Below is a list of sales points in the Netherlands for sculpting tools and sometimes also stone for sculpting in. A few of those are 3-star stores. I compiled this list to the best of my knowledge, but it's undoubtedly not complete. So any addition is welcome.
The most important thing you'll find when carving in Taille Directe (literally: carving the direct way) is that the search for the right shape requires a lot of concentration and therefore energy, but also that you will learn an enormous amount by doing it this way. It is an intensive process. For example, a sculpting a head is not easy: what makes a mouth, an eye, a nose, and how do these relate to each other, what are the mutual angles of the cheeks, the forehead, the chin, etc. etc. And if you change anything somewhere, that affects all other parts. Sometimes you'll notice that you're heading in the right direction, but then you'll discover that somewhere else you need to do a lot again, and sometimes you'll discover that it hasn't improved at all. (read here more about the challenges of the direct carving method)
However much I like to find my way through the stone while carving, it's not always the most convenient way of working, especially when working a large piece. The advantage of the direct carving method is that your thoughts about the shape are growing along with the shape itself, and that you might work a little more directly. Every now and then a 'mistake' will force you to adjust your thoughts, and apart from teaching you to be flexible and inventive, it can actually sometimes produce something unexpectedly positive. The disadvantage is that it can be a very time-consuming way of working, especially in complex work. You're constantly trying to find solutions, and in stone that is not easy. Another disadvantage is that any real mistake in stone will be irreparable. (…read here more about carving indirectly, in which you start off with an exact model)
1. Either choose to be guided by the shape of the stone, or by a rough (clay)model. In a rough stone, one can sometimes get an idea of what they're going to make by the shape of the stone itself. But a precut square block doesn't have that advantage, and in that case, you could do the same with a piece of clay, as I also explained in the first ten tips: take a lump of clay, close your eyes, squeeze into it and see what it looks like.
4. Design the base plate together with the rest of the sculpture. Lots of people, and I did this myself too at the beginning, make a beautiful shape out of their piece of stone, and finish it all and then come to the conclusion that they will have to make a pedestal and fix the sculpture with a steel pin to that. Therefore, design your sculpture with a base plate already attached to it where it can stand on. It also solves a lot of other problems such as fragile legs that protrude. Often it works optically very well when the base plate is a bit smaller than your actual sculpture.
2. Only use direct carving for simpler designs. For really complicated, anatomically exact and precise work that puts all of your abilites to the test, it will be more convenient to start from a detailed, sculpted model, or a casting of your design (indirect carving). Otherwise there's a chance you'll complete something that is not to your liking.
when you integrate a base to your sculpture, it will save a lot of headaches.
3. If you already know what you want to make, then first flatten the bottom end of a rough stone.
It is obviously difficult to work properly when your block rolls all over the place, and it would also cause poor visibility of your design. Place the stone in the correct position on a flat surface, take a compass and thus measure the highest point where material is missing. Now you can inscribe a level line all around on your stone, by using the compass.
Another way to do this is with a block of wood or a piece of board, and a pencil. When you carve away all of the material outside of the line, you will end up with a flat bottom side.
5. Draw on the stone whatever you want to sculpt, and keep on drawing a lot during the carving. This way, you'll keep communicating with yourself while working and you'll keep a clear view of your progress. You can draw with pencil, and crayons also goes well, but it is more difficult to erase. At the beginning, when you're beginning to sculpt with a pointed chisel and a hammer, it will be convenient to not put your sculpture too high, it will work better for you. As you start to work more detailed, you'll need better visibility of your work, so make sure it stands a bit higher by then, preferably at eye level.
6. First, find the main volumes. It will usually be better to not start with detailing on one side while the other side is still quite rough. Precarving the whole sculpture in the rough, will give you a better view of how everything relates to each other. Keep turning and drawing, work on all sides, and keep it rough at this stage.
7. Refrain from carving the holes in the early stages. This is a really difficult one for many people, because in many designs the holes help to show where all parts should go. Supppose, you intend to make a human figure on hands and knees (let's say). You would tend to very quickly carve the opening underneath the belly. And that's exactly what you shouldn't do. Doing that would take a lot of the room for error away, and that could land you into serious problems. Try to keep that hole closed as long as possible, and only indicate with a small carved line where you think the gap should come later. In case this makes that you don't have a good view of the dimensions, you could colour that spot black with pencil. If you'd ever need to carve the arms or legs or abdomen further to the inside, then there will always be enough material left.
always work in a way that all the parts can be carved more to the rear
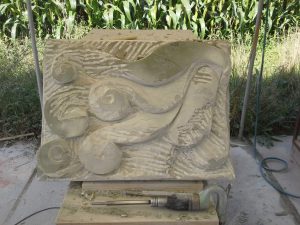
8. Leave margins for errors. That means carving your work in such a way, that in case of an error you can always still carve that part deeper inside. For example, in a relief you will only at the end, when everything is in its proper place, begin to carve the undercuts that will provide good shade effects. When sculpting an image of an animal or human, carve the legs, arms or paws in such a way that they can always be made a bit deeper inside if it doesn't look right. Only when everything is in the right place, one would start with the opening of the intermediate spaces.
9. Save the polishing for the last. This seems obvious, but there are plenty of people who in their enthusiasm start polishing one part while they still don't know what to do with the rest. Sometimes you will find out that you'll need to carve a part of it all over again….
10. Have a fresh look at your own work. Finding your way by working the stone can be a very intensive process, and sometimes you'll be worn out by sheer concentration. Occasionally, you will no longer see how to move forward, so here's my final tip: stop in time, and when you later, or on another day look afresh at your work , you'll suddenly see how to proceed. That 'having a fresh look at your project’ can actually also be achieved by using a simple mirror. Sometimes you'll get the feeling that something is not quite right, but you don't know what. Someone else may often notice it, but you won't, because you've already been looking at it for a long time. By looking through a mirror at your own work you'll see it with a new look again, and you'll notice things that you didn't previously.
Please note: I've been so busy with making things that I teach no courses or other instructions . So it's no use calling or emailing me about that.