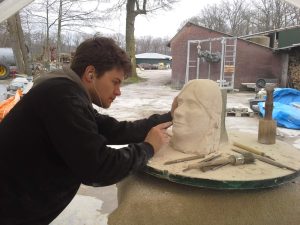
Ten tips-1: techniques
Tips for beginning sculptors in stone-1: technique
When I first wanted to learn to carve in stone I had trouble finding someone who could teach me this thoroughly. That was, of course, in the time before the internet, around 1990. Now, it's become a lot easier; just type in as a keyword that you want to sculpt in stone and you'll find loads of courses and holiday weeks . Unfortunately, not every teacher is equally aware of the technical aspects (there are still a lot of courses for rasping in soapstone) and neither does every aspiring sculptor have an appetite or time or money for a course. The following 'tips for beginning stone sculptors'’ should help you well on the way.
1. Just start carving! Stonecarving goes from coarse to fine, and the chisels used to go from point chisel to tooth iron to flat chisel. Choose a soft limestone.
2. Don't know what you want to carve? Just grab a piece of clay, close your eyes, squeeze into it and see what it looks like. You still don't know? Do it again. Try to vary with less or more thinking, shorter or longer time modelling, or not thinking from your head but just feeling with your hands! Then proceed to make a sketch on paper or a model in clay as memory support. This will give you guidance when figuring out what material should be taken away.

3. Use images on the internet! The internet is chock full with images of animals and people in all sorts of cool poses. Choose a topic that hasn't got too many holes or protrusions, because these are hard to achieve in stone, especially if you haven't got much experience yet.

4. Buy a few simple chisels. If you're going to carve in wood you'll need many gouges and chisels, but for stone you'll only need a few. You'll need a point chisel (‘spitsijzer’), a flat chisel and a tooth chisel. Next, you'll need a hammer and that's it. You could choose to buy these chisels in a few different widths, but in the beginning you won't need much more.
Chisels wear out of course, and then you'l have to sharpen them again by grinding. Therefore, it is not really smart to buy an expensive stone chisel. Rather buy a chisel holder, in which you can put several different and interchangeable inserts . There are coarse and fine-toothed inserts and flat insert plates. One could also grind such an insert plate a bit round, for instance for carving a pit without leaving ugly spots with the corners of the chisel.
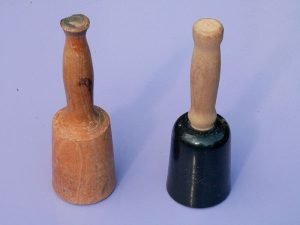
5. Don't choose your hammer too heavy. There are hammers of steel and (soft)iron for hitting hard, and hammers or mallets of wood or plastic for a rebounding stroke. The hardest hitting would normally be done in the beginning, and for finer work, choose a mallet. To which the appropriate chisels fit. Chisels for a mallet have a widened head so you won't damage the mallet on the head of the chisel. Chisels for a steel hammer have a small head. Through all the beating it will get a sharp burr on it, which you'll regularly need to remove by grinding, or else you'll injure your hand. Choose a steel hammer and a mallet. Choose a plastic mallet if you have the money, because that will last a lifetime. Are you very strong? Then buy a steel hammer of 1 kilogram. Heavier makes no sense, you'll only demolish yourself besides the stone. Are you average strong? Then choose 750 gram. If you are very slender-built you will find even that too heavy. For a mallet it will be about the same.
6. Practice your stone masonry techniques! Below is a series of videos with the basic techniques for carving a rough stone surface flat. It seems uninteresting to just carve a plane, but these are techniques you will keep encountering during the carving of your sculpture.
7. Download the free pdf (in Dutch) with stonemason's exercises: carving a plane, concave and convex profiles and other stonemasonry tips: Basic techniques of sculpting in stone.pdf
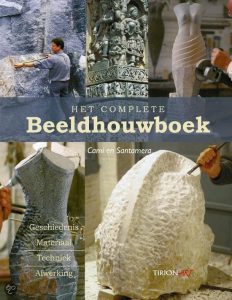
8. A good book as a reference guide: The complete book of sculpting.
Camí Santamera (Josepmaria Teixido i Camí/Jacinto Chicarro Santamera)
Cantecleer Baarn, 2001. ISBN 90-213-3126-8 / 90-439-1253-0
A clear book with good pictures and explanation of different movements and techniques of sculpting in stone, for example direct carving, copying with the "pointing machine", enlarging and various methods to copy models in stone.
9. Visit someone who already has the skills necessary. You will learn more by watching someone work then from all the tips on paper. If you're not able to visit a sculptor, then search for videos on the internet. Below is a video of myself; Read more about this project here.]
10. And finally: do look for that thorough course in sculpting where you can learn everything about the techniques of carving in stone. It's always about what you make, and about your design. Technique is not important, until the lack of it starts to become an obstacle. For the end result, it doesn't matter how you have created your sculpture, even if it was made with your teeth or with a screwdriver. But if you get stuck in your work out of frustration because you can't make what you have in your head, that would be a waste of your time. Therefore, learn the techniques well, so that later on, you'll never need to bother with those again. As a beginner it would be best to learn all about the practicalities; which will provide a basis that gets you started for the rest of your life. Later on, you can still focus on the design, which is actually the only thing of importance.
Please note: I've been so busy with making things that I teach no courses or other instructions . So it's no use calling or emailing me about that.
Continue to the next ten tips.