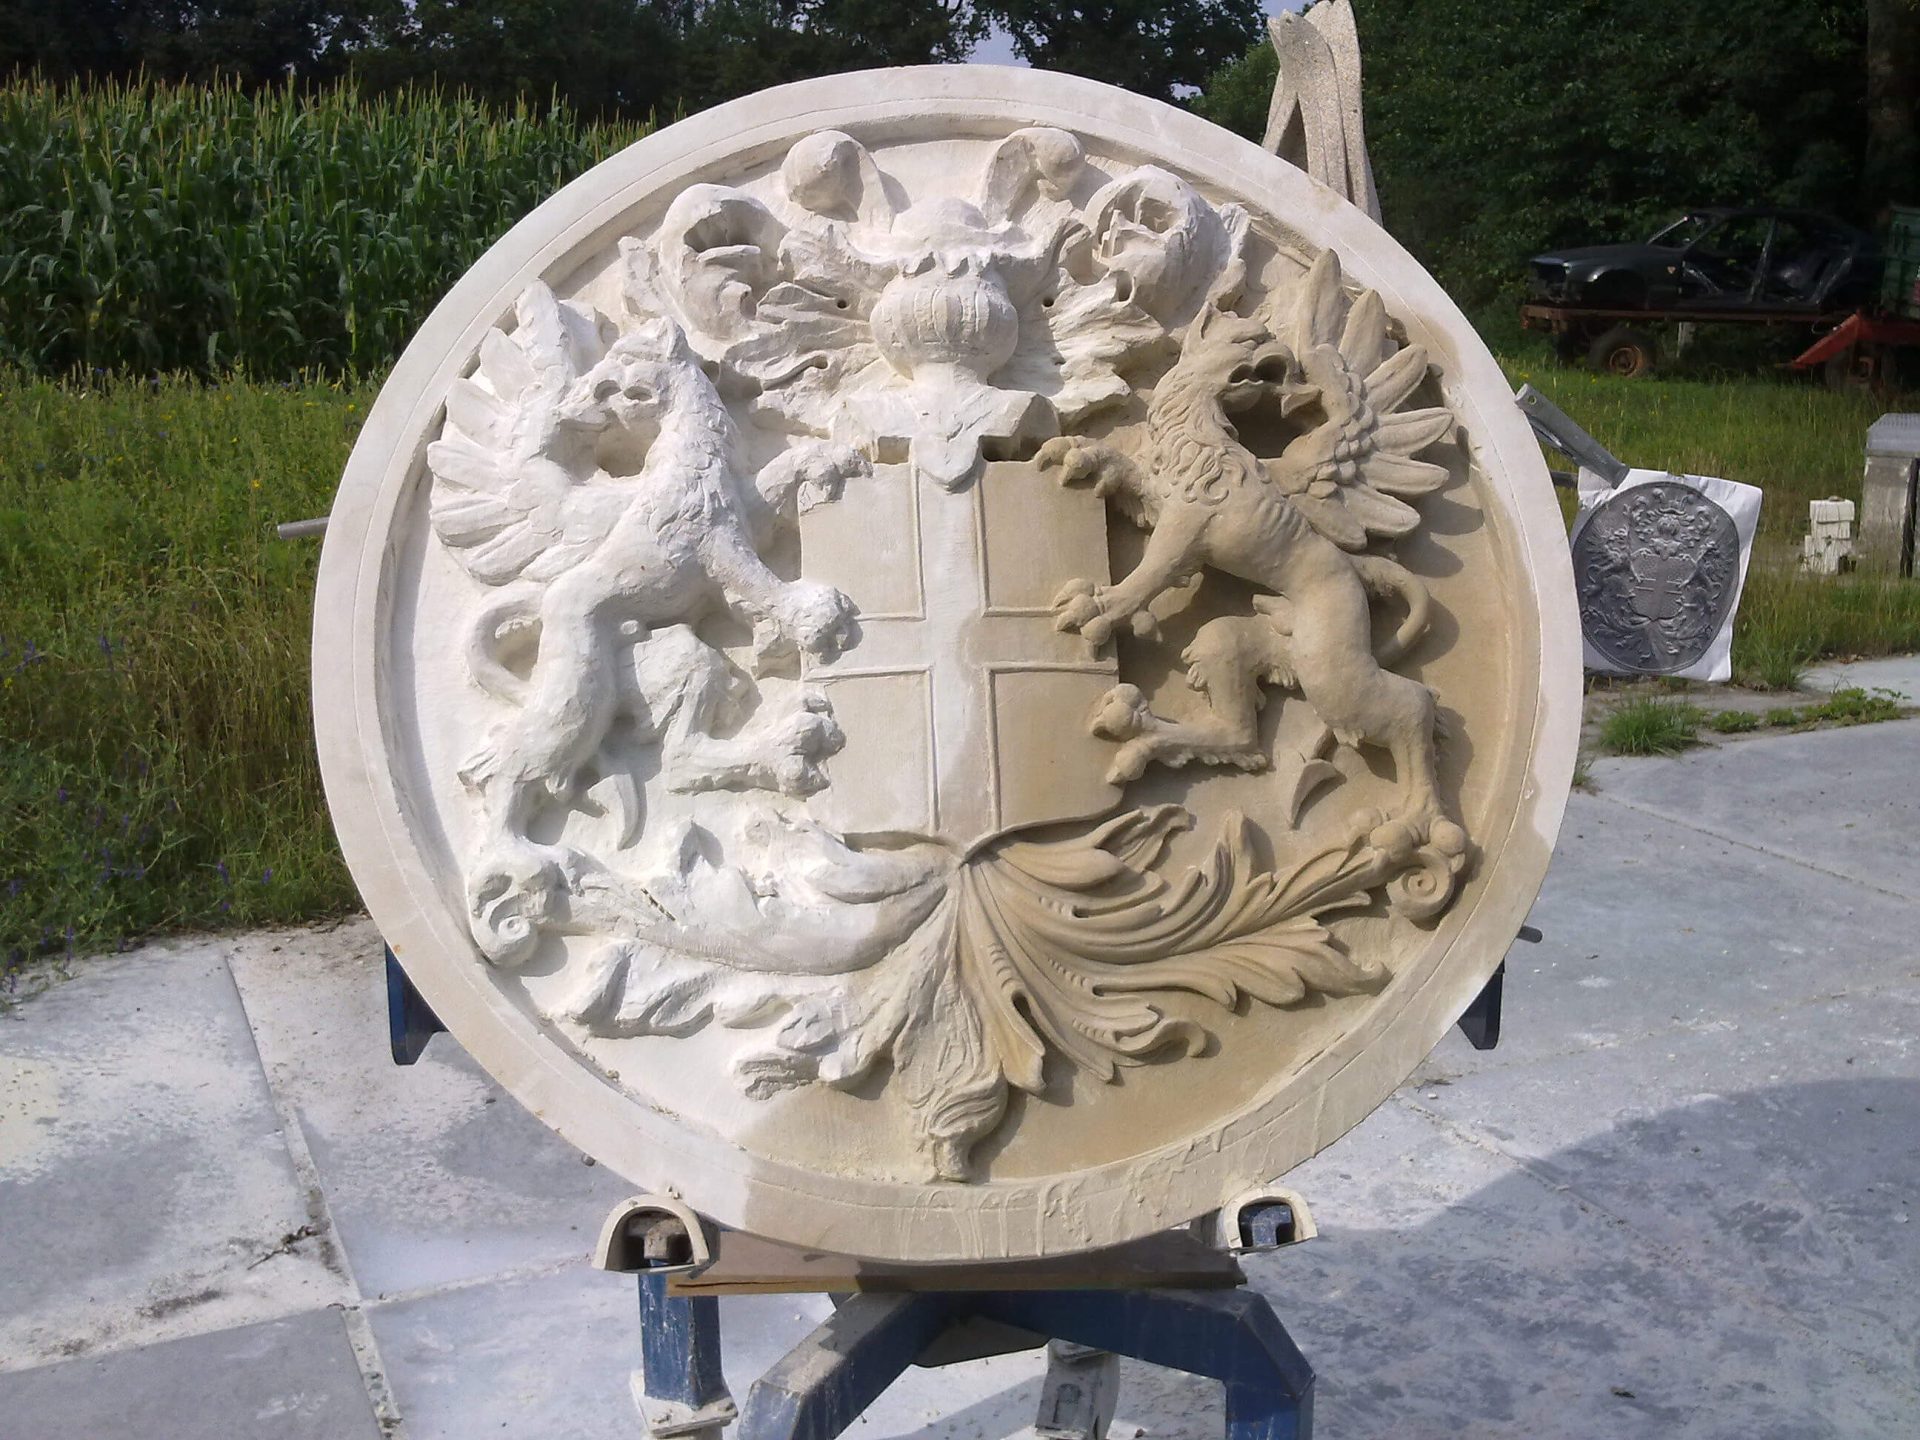
With 33 degrees Celsius it's actually no weather to be carving right under the hot sun. In anticipation of my final shelter I just stretched a tarp today, and if I just keep the floor wet, it'll be alright.
The precarving is making good progress, just a while and I can start detailing the coat-of-arms finally.
In consultation with the client, I've carved the shield slightly convex, making it a bit more lively. Result of course is that the sides ende up quite a bit lower, so I had to carve the claws of the right hand (to the audience left hand) Griffin all over again. Because I already knew this could happen, there was no problem. I outlined the cross on the shield, and that also still needs to be finished.
In addition, I have made a start with the helmet and the left (for the viewers at home right) griffin.
All volumes are now just about roughly shaped, it just looks very crude still. That is intended; First I wanted to see how the parts relate to each other. I prefer to do the detailing only when it's clear to me there will be no more surprises.
On the picture I got as an example, the shield contains a series of balls and lines. That's a color coding that's used in Heraldry: dots means gold, and lines stand for Red. So if someone made a line drawing or an unpainted relief of a coat of arms, expert could know anyway that the shield was painted in gold with red. So each color had its own code. And not only that, actually red is called gule, gold is called or, black is sabre, green is vert or sinople, silver isargent and blue azure, and each color has its own display in black and white, for example, by cross-hatching. Because the weapon is seen from the position of the Knight, left and right are dubbed opposite for the viewer.
The majority of those I 'sort of' knew, but with the internet it is very convenient if I can check this stuff quickly. At home in front of the computer, that is, when I'm carving I have no time for that.
Nasty the first message about this project.
Nasty the next post about this project.