In the previous two articles, here and here, I explained that the eight statues we've taken down from the Minervalaan 28-30 arrived in a very battered state. There ware several serious fractions and sometimes quite a loss of detail.
In addition, in the distant past they had already been repaired with a very hard mortar, which had started to detach from the surface in many places. The multiple paint layers didn't help this either. Time to repair them and make a reconstruction before we were going to carve the copies.
← Detail of the image Winter. Old repairs and rusty iron staples are clearly visible on the eroded pieces of of its surface.
Glue-up
In particular the right hand Faun, the lady of Autumn and the Diggin Man of Winter came down in several pieces. Pressure from the building that rested on it and seeping rainwater will probably be to blame for this.
Because these sculptures are not going to be restored, but will be copied, glue-up was not a complicated matter in this case. Just gather up all the pieces, find out how they fit, fill the fracture surfaces with glue, and clamp them right up.
Moisture transport
Now this is not something you can do anywhere. Suppose a sculpture is to be reinstalled in an outdoor environment, then you'll be dealing with moisture penetrating it. That moisture will eventually have to come out again, and it will follow a transport process from top to bottom and from the inside to the outside. Should it encounter a full dense glue layer on that journey, then problems will be guaranteed.
Over a horizontal glue surface, for example, the moisture above the glue will remain within the stone for a long time, and it's difficult to get it out sideways. The result will be a strong deterioration of the stone above the glue layer, especially in a frost period after a wet fall or winter. So what we have done here with saturated glue surfaces was only possible because these sculptures are no longer placed outside.
Old repairs
After the bonding we started looking for the original shapes of the sculptures. In some cases this meant that we had to remove large chunks of old repairs. Sometimes too much material had been applied, which particularly ended up making legs too plump, with thick edema ankles. Not all repairs have been removed; we also counted on it that we would be carving a lot of details in the major volumes later on, in the phase of sculpting in the new stone.
If you'd remove all repairs, that would also mean a loss of information, all the more so since it irrevocably comes off only while taking a layer of the original sculpture with it. The underlying stone is much softer than the tough cement repairs that were often very much stuck onto it.
Shedding its skin
Not all repairs were stuck on that much. Due to this barely permeable repair layer, and especially in combination with that dense layer of latex paint, moisture was building up within the underlying tuff. As mentioned in the previous post, there was a rainpipe hidden in the facade on the right façade corner, which dripped its moisture into the statuettes for years.
The result was rich algae bloom, peeling skin of the statuettes, and, in the case of the Man Sowing, a total crumbling of the surface. I already mentioned that for this reason recovery was no longer a solution. The repairs would one day, in the future, just come back down, underlying stone and all.
Photographic material
For carving a good reconstruction in new stone, it was necessary to have usable models, based on the old statuettes. In this case we repaired the sculptures with a soft type of plaster. For this, I first collected as much photo material as possible, in particular from the sculptures on the other side of the street, which were in a much better state. A year and a half earlier I'd also taken a lot of photos of the views of each statue : from the left, left front, front view, front right, and right.
I first printed and laminated these photos on A3 format, but those big prints were very awkward to handle. I discovered that a small book with all views in size A5 was much more convenient: because you can quickly browse through those. Ideally, these booklets would be printed on plastic, so that they wouldn't be susceptible to moisture and rain, But luckily paper also worked.
Who does what?
Jelle and I took on the reconstruction of three statuettes each. Jelle the ladies from Spring and Summer and the left Faun with a goat, and I the Digging Man of Winter, the lady of Autumn and the right hand Faun with his deer. Tim enthusiastically started working on the old woman of Winter and the Sowing Man of Spring.
Plaster needs to set between the layers and we also needed time to assess the right shape, so this was work that we undertook in phases, sometimes in addition to other projects of sculpting at the same time.
Loss of information
During such a reconstruction you will always be faced with puzzle work when sculptures are so weathered. Details are no longer easy to trace back and you need to make choices. Which version is correct? That what we think to recognize here on this statue, or what is still visible on the other side of the street? It became clear that earlier restorers have not always known it either. Flat circles turned out to be the sunflowers of the Summer, and vague lines became ears of wheat or bunches of grapes.
We noticed that the four Muses of the seasons also depicted four phases of life: the young girl stands for Spring, the young woman for Summer, the mature woman for the Fall and the old woman for the Winter. Each had their own attibutes: flowers for Spring, ears of wheat and sunflowers for Summer, vines, grapes and apples for Autumn, and a cloak for Winter.
The lines of their hair also started to become much more defined as soon as we patched up the missing pieces: they continued into the facade.
Tim's Man Sowing
I've already mentioned it a few times before: the Man Sowing was the worst case. There was actually no recognizable detail anymore at all, and after dismantling even less was left of it
. Once crumbs are still hanging on with their last edge, just a touch would be enough to lose those as well. But we already knew that in advance, hence all those photos.
Now in addition to his work for me Tim also works as a volunteer at Museum De Dageraad, where everything can be found about the buildings of the Amsterdam School. And what do you know, he just happens to find the original plaster model of our missing sower hanging there, on the wall!
To make a long story short: he was allowed to borrow it for his reconstruction, and in return, he suggested that he would restore this plaster model (which he did beautifully and in a careful way!) and then, based on this plaster model, he was able to reconstruct the entire tuffstone Sower again .
The Man Digging
I myself had taken on the reconstruction of the Man Digging from Winter. He was missing his lower legs, the clogs and the shovel, and other details had become very unclear. However, the upper body was still so sharp that the original chisel strokes of Jaap Kaas still reappeared from under the thick paint layer.
This showed that the sculptor had finished his statuettes at the time with various chisels: the round chisel, the claw chisel and various flat chisels. This would give us guidance later during the sculpting in stone.
The Man Digging had something else that was unclear next to his shovel. It looked the most like a continuous beam with a jumble above it. After studying all the photos, I thought it could represent a bare tree, which is being planted by Man Digging.
Gallery: reconstruction of all figurines step by step
After this repair round an inspection followed. Once everything was approved, we went on to the next phase: carving them into new stone. Read more about this in the next blog post.
It's not all about carving (flying buttress no.)sculptures in the Sculptor's Workshop. Last week I copy-sawed an angel and made a Shivalingam.
Shivalingam
the sanding and 'sweetening’ of the lingam
A customer told me he would like to own a Shivalingam. Not because he has a special religious connection with it, but he just liked the shape, he said. Now he still had a piece of Black Swedish granite lying around, from which it could be made. He himself drew the outline on a piece of drawing board. I traced this contour onto a piece of plywood, which allowed me to cut this shape out of the granite with my copying saw.
Fortunately I did not have to polish the lingam, but after the copysawing I spent more than a day of sanding the stone. He wanted it to be finely sanded up to grit 200. The most difficult thing is to get all false dents out of the oval shape, so that a nice smooth shape is created. You can feel it best with your eyes closed. During the work I sang all the Shivabhajans that came to mind, a beautiful meditation.
What is a Shivalingam?
A Shivalingam is an egg-shaped stone, a symbol for God in his unformed state of being. The male principle of Being-Awareness-Bliss (Sat-Chit-Ananda), resting in itself, all-encompassing but unformed. Often this egg-shaped stone is placed in a yoni or panipitha (water seat), a kind of foundation that is a symbol of the feminine principle (Shakti). The Shiva- aspect is Being, Shakti is Becoming. Shakti stands for the expression in all-that-is, the entire creation. So the same energy is Shiva when it is unformed, and the moment it decides to unfolds itself into full creation, you get the feminine creation energy, the Shakti. These are two aspects of the same energy. During rituals, Shiva is worshiped by pouring water and milk over it.
Read here a number of posts about the lingams and panipithas I made earlier.
An angel in two attempts
The block is cut in half and is upside down for gluing
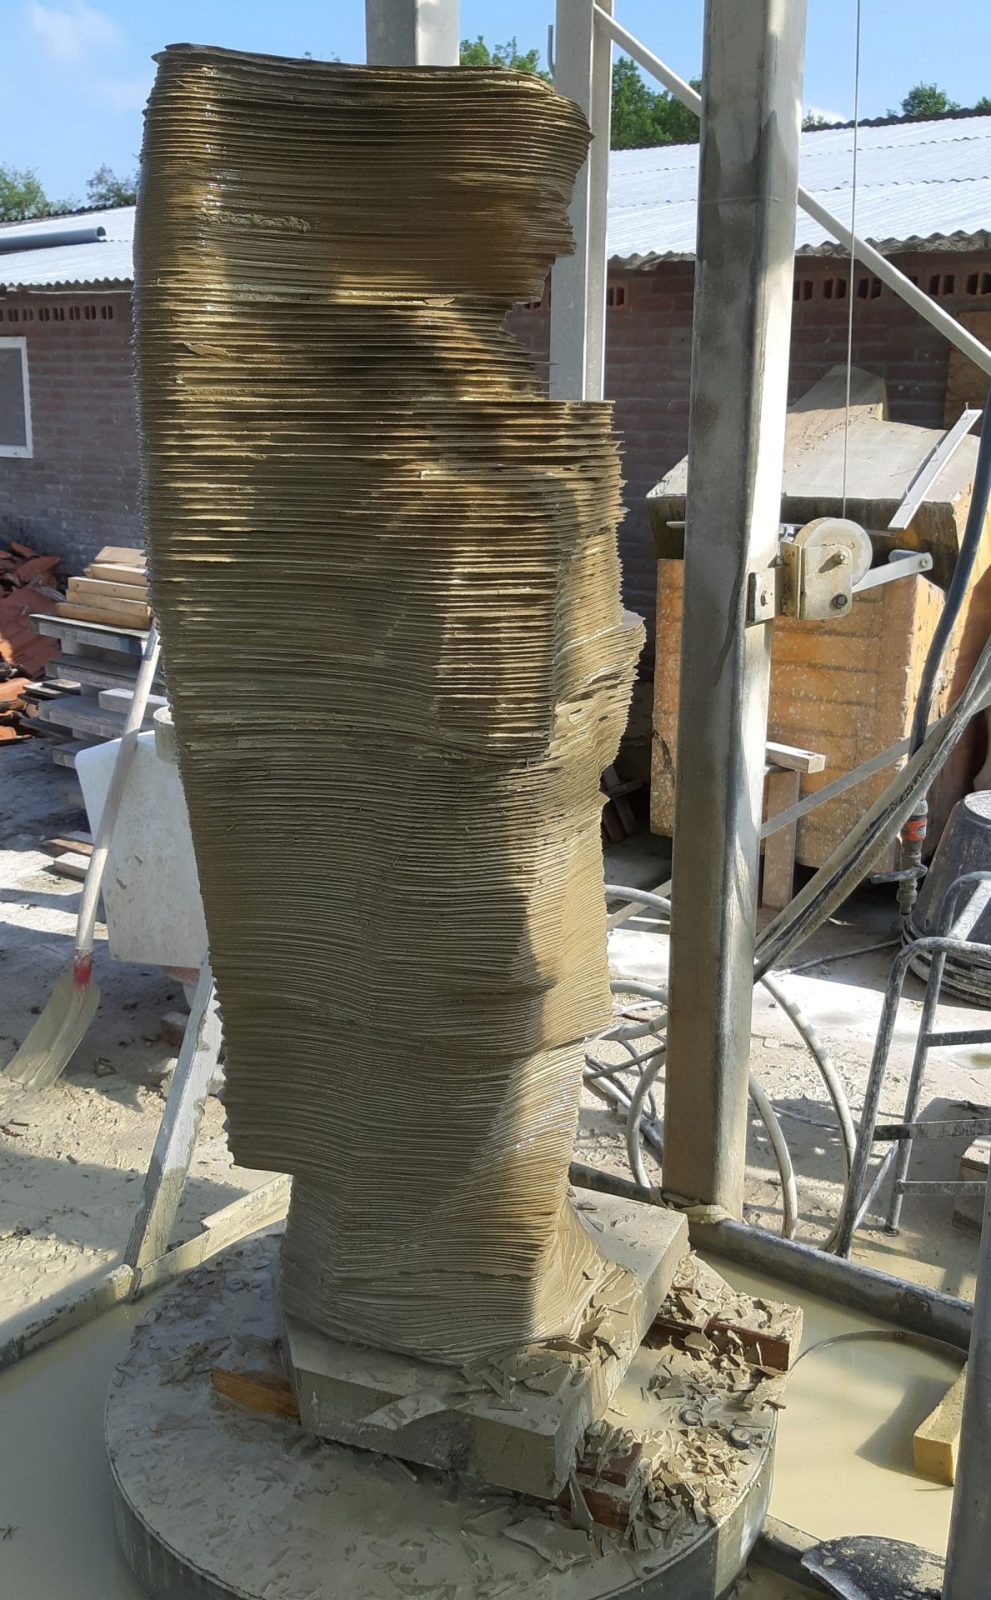
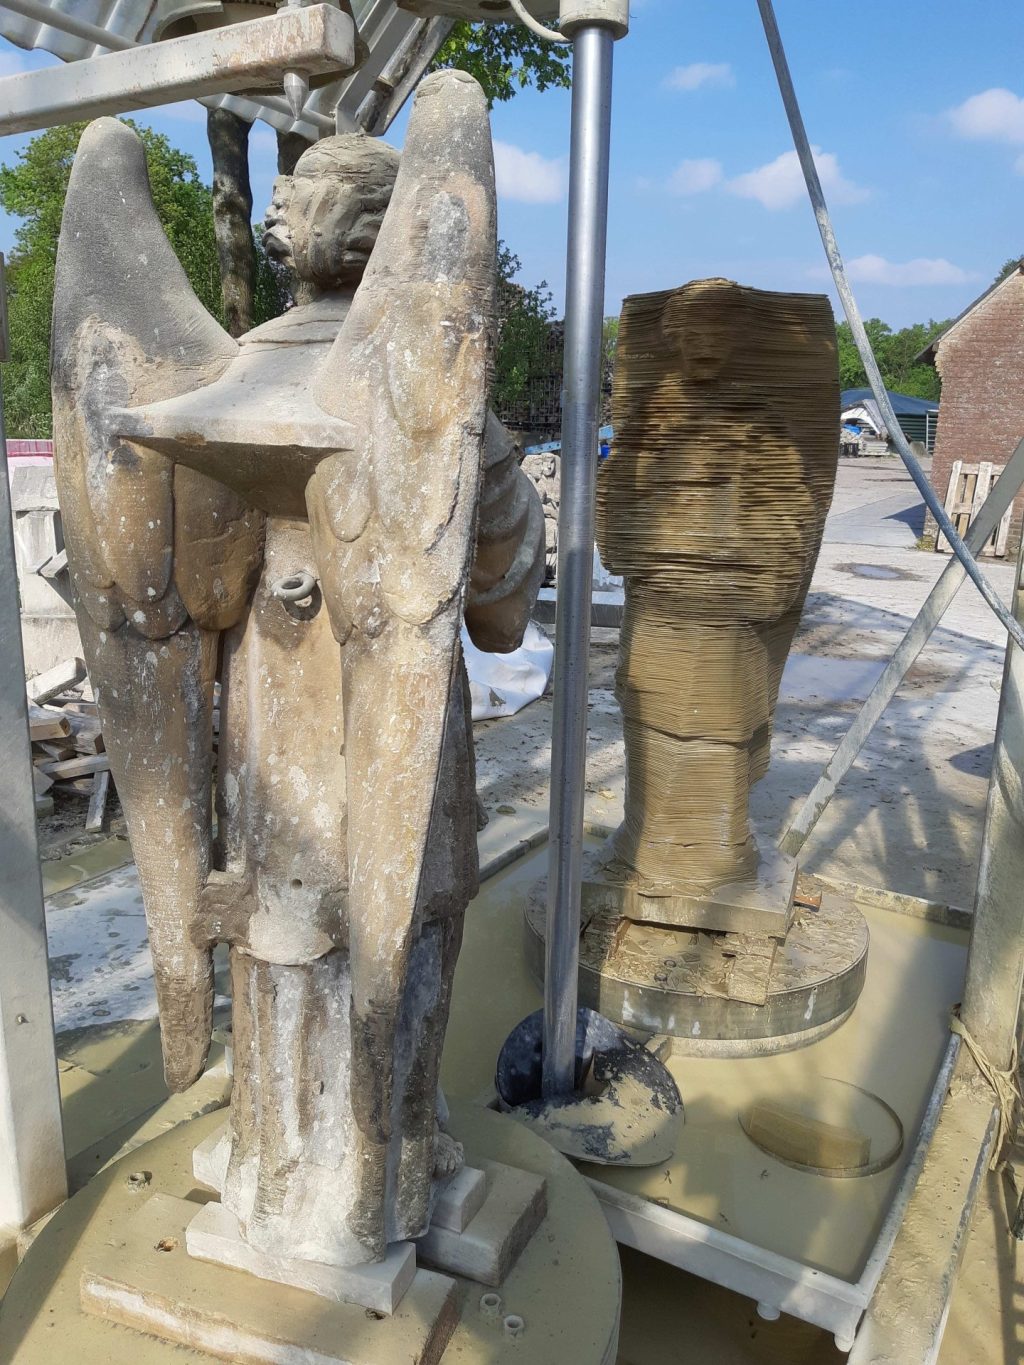
Then there was the sandstone angel I was going to copysaw for my colleague Serge. It is a commission from St. John's Cathedral, similar to my statues of Thomas Aquinas and Pope Leo the Great. He will make a fine copy of this pre-sawn angel again . Last time, Jelle sawed a similar angel, read here now.
However, it was a chore with a few snags. A few months ago I received a large block of Udelfanger sandstone for this angel. I immediately thought I saw something that wasn't right, and sure enough: the block was more than 10 centimeters too small!
After some deliberation it was decided to attach the bottom 15 centimeters of the statue separately. The reasons are the same as I explained earlier with Thomas Aquinas and Pope Leo: preferably they have the layering (the layers in the block of stone) run horizontally through the statue, instead of vertically, because otherwise whole slices can suddenly fall off. In contrast, you could argue that the thin wings might have been better made from vertical layers, because for that part that position is actually more favorable. It remains a struggle to find the best solution.
Cracked!
the crack runs right through the entire block
from the left- and right a large crack is visible in the block
So I had recieved a block of stone that was way too big, but not tall enough. I cut it lengthwise with my concrete chainsaw in two pieces, and made a separate base from the lower part of the spare. I glued it to the bigger piece and started copy-sawing. But it soon turned out that the small black line I had found was a big crack, that ran through the block, from top to bottom. Oops! I put the block aside and made some phonecalls, and a week later I received a better block.
Second try
the second block of stone is cut in half with the chainsaw and glued. The plywood contour templates are next to it for the sizes
I cut up this block lengthwise with the chainsaw as well. Then I hoisted it upside down onto the copy-sawing machine, where I cut a nice flat surface. The spare part also underwent this treatment, and I cut a slice of about 20 cms from it. I was asked to glue these two pieces together. But if you have been reading along for a while, you'll know that I can't just put a thick layer of epoxy glue between them. You'd get a waterproof layer that will cause all kinds of problems.
I put both pieces upside down. After I made the surfaces to be glued as flat as possible, I prepared a special mortar in the right colour. I applied this thin mixture on the surface and lowered the smaller block onto it. For just a little while I was able to move that block, until the parts suddenly sucked tight .
drilled holes with stainless steel pins and poured epoxy
It worked, a minimal, permeable connection was made. After the weekend, the mortar had cured and I drilled two deep holes with the diamond drill. In these, two stainless steel rods were glued with epoxy. A day later, everything had set and I was able to turn the block and start copy-sawing the sculpture.
Careful
roughly presawn (at the top) and medium fine (at the bottom)
It was not for nothing that this angel was to be replaced: it was heavily weathered and Serge had filled in all the missing parts with modeling material. That stuff is easy to remove afterwards, because it never hardens. But as far as I am concerned it is very difficult to work like this. I had to hoist and move the statue a few times, so I had to be very careful not to distort anything. And it's extra difficult during copy-sawing, because I could easily push through the surface of the clay with the feeler disc. I prefer plaster or hard mortar for repairs, because then I have to be much less careful. Fortunately, I managed to do it with a lot of patience.
You can see in the photos of the end result that I was very careful especially at the nose.
If I'd pushed through the clay there, this would have also happened on the cutting side, in the stone. One saw cut that ends up a little too deep, would create a lot of problems. In that case, the whole head will have to be adjusted, and be made further back. So rather a fraction too much material than too little in that place! And it turned out that the glue seam was almost invisible, you really need to know where it is, to spot it. It might end up a bit more visible in the sanded end result, but even then it will barely be visible.